Creating a custom integration of the PrintWatch API to detect 3D print defects
Machine Learning (ML) allows us to fix everyday issues to increase efficiency, reduce waste, and give you a an advantage in business. PrintWatch is a software and API that detects 3D print defects in real-time while your print is running. The software monitors your 3D print job and detects any defects that begin to form using Machine Learning models, and once a defect is detected the software tracks it’s development to see if it worsens. When a defect is determined to have worsened, PrintWatch steps in and can take an array of actions set by the user. Some of the actions include:
- Pausing the print
- Turning off the extruder/hotend heat
- Turning off the print bed heat
- Sending a notification to the owner of the printer
- Any custom functions created by the user
The easiest way to use PrintWatch is through OctoPrint as a plugin, however some individuals may require a custom integration. In this blog post, we will demonstrate how to create a custom integration of the PrintWatch API using python.
Requirements
- An active API key (get yours here)
- Internet connection
- SBC or PC with a camera
- Python 3 installed on your device
Usage of the API requires an internet connection, if a design requirement prohibits the sending and receiving of data to the printpal.io server, we offer an in-house solution that can run locally. Contact us for more information.
Process
Step 1: Pull the PrintWatch Client
To pull the PrintWatch client, either use Git or the GitHub website. If you are using Git, follow these steps, otherwise follow step 1.B below:
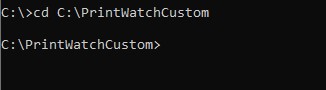
1.A. Navigate to your working directory
2. Pull the PrintWatch Client using the command ‘git clone https://github.com/printpal-io/PrintWatch.git’

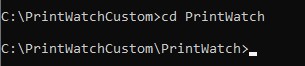
3. Change the working directory to the PrintWatch Client using the command: ‘cd PrintWatch’
1.B. Navigate to https://github.com/printpal-io/PrintWatch
2. Click on the ‘Code’ button and select ‘Download ZIP’
3. Extract PrintWatch-main.zip
4. Use the extracted ‘PrintWatch-main’ folder as your working directory
2. Install despendencies
Follow along to install the libraries properly.
- In your working directory command console from earlier, issue the command: ‘pip install opencv-python’
3. Basic test example
- Using your python editor with the working directory ‘PrintWatch-main’, create a new file. In this blog, we will be naming the file example.py
from printwatch.client import PrintWatchClient
from printwatch.utils import *

# Insert API key
printer_info = init_default("api_key")

# Create Client object
client = PrintWatchClient()
In this code snippet, we are importing all of the required libraries, and then creating the ‘client’ object that will allow us to communicate with the PrintWatch API using very simple functions.
2. Send a test inference request to the API.
# Open an image to inference
with open('img.jpg', 'rb') as f:
  image = bytearray(f.read())

# Create the payload information
payload = client._create_payload(
    encoded_image = image,
    printer_info = printer_info
)

# Send the API request
response = client.infer(payload=payload)
print(response)
In the code above, we open the image and load it into a bytearray that will be sent to the API using send_infer(args). The results variable is a dictionary item that will contain the generalized results of what the detection model detected. The amount or type of information returned is dependent on the parameters set by the user in the request. This basic example will return the following:
{
    'statusCode': 200,
    'defect_detected': True,
    'boxes' = '[[0.1262, 0.1627, 0.2892, 0.3740], [0.8562, 0.9011, 0.9999, 0.9975]]'
}
4. Looped example
from printwatch.client import PrintWatchClient
from printwatch.utils import *

# Insert API key
printer_info = init_default("api_key")

# Create Client object
client = PrintWatchClient()
#initialize variable to stop the stream
triggered = False

#variable to hold the inferences
buffer = []

#variable to control buffer size
BUFFER_SIZE = 16

#initialize the last_time variable to control the frequency of requests
last_time = 0.0

while capture.isOpened() and not triggered:
    #read data from the capture device
    if time.time() - last_time >= 10.0:
        ret, frame = capture.read()
        cv2.imshow('frame',frame)
        #convert frame to bytearray datatype
        data = bytearray(cv2.imencode('.jpg', frame)[1].tobytes())
        # Create the payload information
        payload = client._create_payload(
            encoded_image = image,
            printer_info = printer_info
        )

        #send the inference
        response = client.infer(payload=payload)

        last_time = time.time()

        #analyze the results
        if result['defect_detected']:
            buffer.append(True)

        #check the buffer
        if len(buffer) > BUFFER_SIZE:
            buffer.pop(0)

            #buffer percentage of defective detections
            percent_defective = [i[0] for i in buffer].count(True) / BUFFER_SIZE
            if percent_defective >= 0.60:
                #Insert events to take place when the system triggers a defect.
                #Intervention with the printer will require a serial communication
                #with the printer and a custom integration of sending a pause command. This feature
                #will be added to the PrintWatch client in futrure releases
                triggered = True


capture.release()
cv2.destroyAllWindows()
In this code snippet above, the video stream and client objects are initialized along with a few variables that will be used in the looping process.
The variables and their descriptions are:
- triggered – used to end the stream if we detect a defect continuously through our buffer.
- buffer – used to contain the trailing 16 inference results. This data structure is used to calculate the % of positive defect detections.
- BUFFER_SIZE – user specified buffer size. Defaulted to 16 inferences, can be set to more if the user wants PrintWatch to monitor for longer before triggering an event.
- last_time – used to store the last inference time.
The first thing that happens in the loop is to grab a frame from the webcam using opencv. Once the frame is grabbed, the datatype is converted to a bytearray. The data going into the send_infer() function for the image must be of type bytearray.
Once the image is converted to a bytearray, the client sends an inference request using send_infer(data, api_key). Once the request is handled by the server, we analyze the results, only looking at the classification of the items in the image using result[‘defect_detected’] which is a boolean. Based on the response, the classification is appended to the buffer array.
Once the buffer array fills up to a size of 16, we begin to evaluate the percentage of positive detections in the last 16 inferences, correlating to the last 160 seconds of printing. In this example, if the percentage of positive detections is greater than 80 percent of the buffers size, then we will issue an email notification to the user that the print has a defect. Once the email is sent, the while loop exits due to the triggered variable being set to True.
Conclusion
This is a very basic example of using the PrintWatch API for monitoring a 3D printer for print defects in real-time using a webcam. This implementation in the example only allows for the user to be notified of a fail print. A custom implementation must be created for communicating with the printer to pause or cancel the print safely. The PrintWatch Client will have added functionality that can do this for the user in the future. In the meantime, any interested parties should contact us for more help.
Author
