About this video
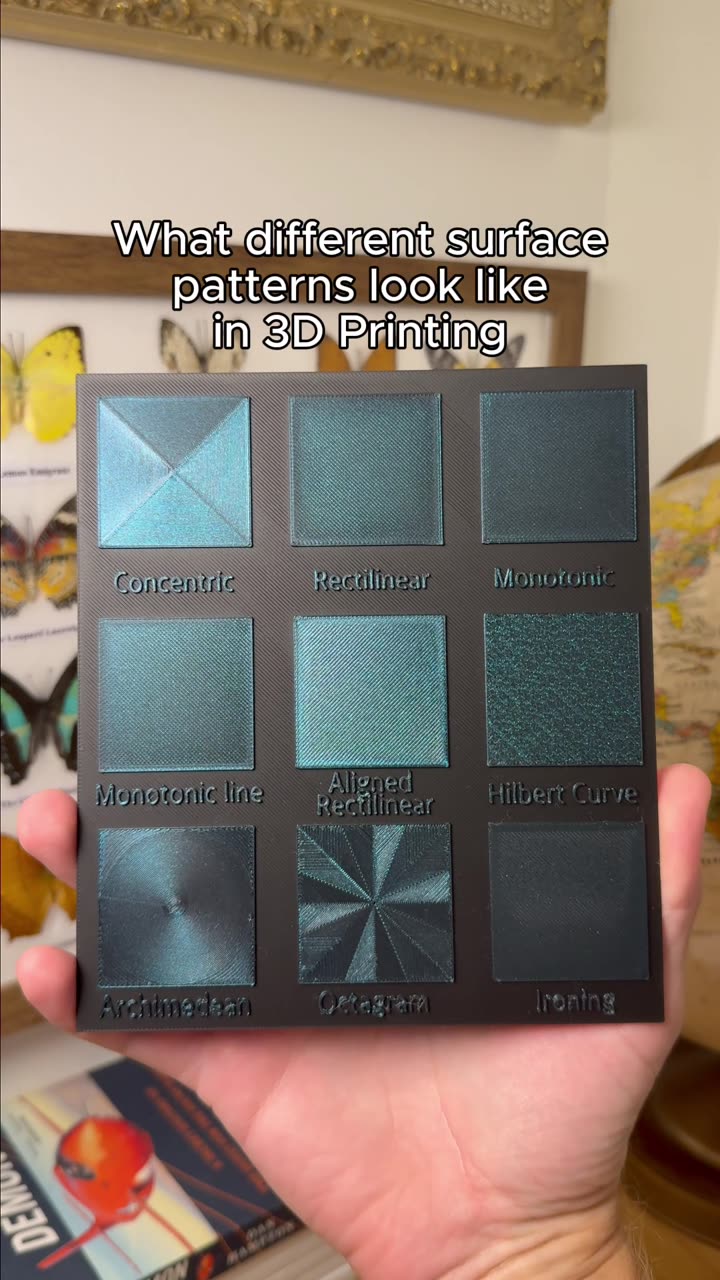
What Different Infill Percentages Look Like in 3D Prints
If you've ever wondered what's actually happening inside your 3D prints, this comparison shows the full spectrum from completely hollow (0%) to solid (100%) infill. Understanding infill density is one of the most important factors in 3D printing, affecting everything from structural strength to material costs.
Breaking Down the Infill Scale
- 0-5%: Nearly hollow prints, showing only the outer shell. Best for decorative pieces or prototypes where strength isn't needed
- 8-15%: Lightweight internal structure visible. Good balance for low-stress applications like figurines or display items
- 20-30%: Standard default settings on most slicers. Offers decent strength for functional parts without excessive material use
- 50%: Half solid, half air. Provides significantly more strength while still saving material compared to higher densities
- 75%: High density with substantial fill. Ideal for parts that need to withstand mechanical stress
- 100%: Completely solid prints with no internal voids
Key Factors to Consider When Choosing Infill
- Structural requirements: Functional parts typically need 40-60% infill; decorative items work fine at 10-20%
- Material type: PLA is brittle at high densities, while PETG handles denser prints better
- Print time: Higher infill dramatically increases print duration
- Material cost: Doubling infill doesn't double cost, but does add significant material expense
Common Questions
Does higher infill make prints stronger?
Yes, generally. However, the law of diminishing returns applies—there's minimal difference between 80% and 100% infill in most cases.
What's the best infill pattern?
Gyroid and cubic patterns offer excellent strength-to-weight ratios. Triangular patterns provide good rigidity for certain applications.
Does infill affect surface quality?
Indirectly—higher infill means more material extruded, which can reduce warping on larger prints but doesn't change top surface quality.
Pro Tips
- For most prints, 15-20% infill provides the best value
- Use variable infill settings to add strength only where needed
- Combine moderate infill with proper wall/top/bottom thickness for best results
- Consider your layer height—higher infill shows more prominently at thicker layer heights
Choosing the right infill percentage is about balancing strength, material usage, and print time for your specific project needs.