All resources

About this video

Viral 3D Printing Hacks Put to the Test

The internet is full of viral 3D printing hacks that promise glass-smooth finishes, stronger parts, and effortless support removal—but do they actually hold up? This video works through ten of the most-shared tricks and separates the legit techniques from the clickbait.

The Hacks That Worked

  • Acetone vapor smoothing (ABS): Sealing an ABS print in an airtight container with acetone-soaked paper towels melts away visible layer lines for a glossy, glass-like finish. Smoothing time runs about 1–4 hours depending on print size.
  • The heat mold trick: Printing a heat-resistant base in PETG or ABS, then pressing a heated PLA part onto it, lets you shape custom forms cleanly.
  • Dovetail cuts in the slicer: Using the slicer's cut tool set to "dovetail" creates interlocking connectors that snap together—often with no glue needed.
  • Top Z distance tweak: Raising the support top Z distance to around 0.275mm made supports pop off with a clean surface.
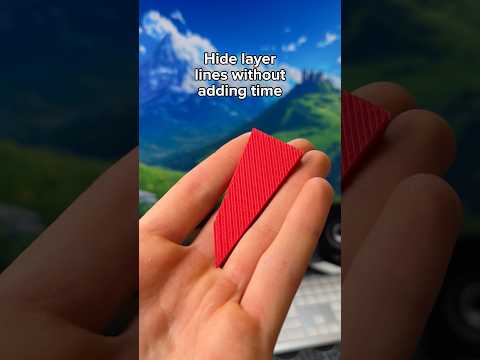
  • Variable (adaptive) layer height: Enabling adaptive layer height noticeably reduced layer lines at the cost of longer print time.

The Hacks That Flopped

  • Zero bottom layers: Setting bottom shell layers to zero saved only ~16g of filament while leaving an exposed, ugly base—not worth it.
  • PETG support interface: Promising in theory, but results suffered when wet PETG was used. Dry your filament first.
  • Annealing PLA in an air fryer: Heating at ~100°C for an hour to strengthen parts didn't show clear results on small samples; a proper oven setup is recommended.

Materials & Tools Mentioned

  • ABS, PLA, and PETG filament
  • Acetone, airtight container, paper towels, magnets
  • Heat gun, air fryer or oven, cutters
  • A budget beginner printer for testing prototypes

FAQs

Is acetone smoothing safe? Acetone is flammable and gives off strong fumes—always work outdoors or in a well-ventilated space and avoid open flames.

Which hacks are most beginner-friendly? Dovetail slicer cuts and the top Z distance support tweak require no special gear and deliver reliable results.

Does annealing really strengthen PLA? Controlled oven annealing can improve strength, but temperature control matters—an air fryer is inconsistent.
Full Transcript

I'm gonna be trying the most viral 3D printing hacks such as glass prints or putting them in the oven because most of the time they don't even seem real so I'm gonna be trying to expose them the most viral that I found was that you can get this look on your 3D prints using acetone some ABS 3d printing material and an airtight container and it should completely hide the 3D printed look I think that there's no way that this is real it has over 4 million views so let's see if these people got scammed and so I made this bench because we can clearly see the layer lines then you're gonna take an airtight container put some paper towels inside of there and secure it to the walls using magnets just like this so that it actually sticks to the wall and then something from non plastic to actually raise the model and I'm gonna be doing this outside because the acetone is very dangerous and I'm just gonna pour a bit inside of there and then close it as soon as possible so that the least amount of acetone actually runs out so it will look something like this and then you just need to wait depending on how big your print is about 1 to 4 hours and you can always check on it so I just brought the Benji from outside it has been over 3 hours and so let's see if it actually worked out this doesn't look like it was 3d printed at all I probably let it stay there for a bit too long and that's why it looks like from water but if you want you can just adjust the time and the amount of acetone that you use and you're gonna get the finish that you want and look it looks exactly like a glass so I would definitely recommend trying it out but be careful when you're using acetone and ABS the next one is from the very well known Uncle Jesse The Heat Mold Trick who says that we can get these 3d printed things just by using a heat gun and they look absolutely amazing since this is from Uncle Jesse I actually believe that this one might be possible to do this you actually need to print the base of the form from something like PETG or ABS or something that's heat resistant so that then when you print something that you're gonna be heating up from PLA it doesn't stick to the free to print so I have the base in my slicer I set it to Pet G and then the print that you're gonna be heating it up you're gonna be printing it from any PLA and this when it's heated up we're gonna be pressing it onto the form and so I actually made this hard form to see if it will work as you can see my Spark X is actually already finishing the form so we're gonna see very soon if you have never seen the Spark X 3D printer it's actually an amazing one for anybody who's just starting out because it's just so easy to use and it's actually very budget friendly so if you don't want to spend any high amounts of dollars on your first 3D printer and just want something simple and easy the Spark X is definitely something that I would recommend I'm turning it on and just about 5 seconds in there 1 2 3 4 5 OK now just quick quick quick quick and we're gonna be pressing it on there and as you can see wow this hack turned out absolutely amazing so thank you Jesse for giving it to me it was definitely a success I would highly recommend trying it out now 3D Scanning a Key with a Phone if you ever wanna get inside of your friend's house just by having a photo of their key this hack might actually help us so let's see if it works it says that we can use our phone to scan something from the real world and then actually 3d print it and his work perfectly fine so let's see if I can do it with this key right over here I actually made this simple setup to be able to scan this key because it needs a clear white background so I just turned this key into this model right behind me I'm gonna be sending it to the printer and we'll see if it works would you ever believe that this key can turn into this I didn't myself but because of this hack now I know that I can turn anything that I have in real life into something that I can 3D print using only my phone and my 3D printer so I'm gonna be using this one more and I definitely recommend trying it out unfortunately I made it a bit too big so I won't be able to use it in real life the next hack says that you can save a lot of filament Zero Bottom Layers Hack if you're printing something with a large bottom and he says that you can do it by completely eliminating the bottom walls so if I had to print like this it would take me hundred and two grams then we reduce the bottom shell layers to zero so let's see how much filament we can save and if it was actually worth it my 85X just finished the 3D print from the top it looks absolutely normal but when you turn it around you see this so it makes the print kind of exposed but how much filament did it actually save so even if you completely scale it up to the full build plate it would go from the hundred and two grams we had before to now eighty six grams so we saved sixteen grams of filament and we have this ugly bottom on our 3D print I'd say that's not a hack at all just a way to ruin your 3D print PETG Support Interface Layer now as we all know the support interference layer very often looks this bad and this hack suggests to use something like pet G for the layer where the supports actually meet with the object so let's try it out on this test model and what he suggests is to use three supports 3 slim and then go into the filament for support and the support rough interference we're gonna set it to pet G slice it and now as you can see it will look something like this where all of this is from PLA and only this one line is from PETG and what it should do is it should completely separate itself from the PLA because they don't bend or melt together so good as PLA does this one also has a lot of likes so let's see if the people got scammed here's how it 3d printed it's exactly the same as in the slicer even made a little perch tower so let's see if it separates OK so the Peggy stayed on the bottom but it's supposed to be that way and now I'm supposed to remove the Peggy and see if the surface is clean so I have my cutter I have the support and let's try to remove it now as you can see it didn't leave the surface that he said it would it actually kind of made a mess but it seems like I used vet P t G because even the layer that was interfering with the support was ruined so I would say that this is mainly my mistake so I would give this a pass because it was really easy to remove it which is amazing but the surface wasn't so great because I used vet PTG so definitely give this one a go but don't use vet PTG now as we all know connecting two 3D Dovetail Cut Connectors in Slicer prints together can be sometimes quite annoying and hard and if you wanna glue them together putting the two flat surfaces against each other is not the best way and so this next hack should actually help us do it a bit better but the hack that he shows actually requires going into modeling so let me show my hack how to do this completely in your slicer if you have the part in your slicer that you would like to slice and then connect or glue together you can actually just click on the model and over here in the top menu you will find this cut tool and in this menu that appears instead of remaining with the planner you're gonna switch it to Daft Tail now you can move the cut around where you want it and when you perform the cut and split the pieces apart you can see that it gives you these perfect connectors that I have already free printed over here and with these daftail connectors you probably won't even need glue cause you can just connect them by sliding them inside of each other and they hold together amazingly but if you want to use glue it's all on you this hack is an absolute legend because it can connect anything that you can put and import into a slicer just like this now the next hack Annealing PLA in an Air Fryer should help with the strength of the print which is called annealing and he just puts it in his oven but since my family would probably kill me if I put the 3D prints in our oven I'm gonna be using this old air fryer and that's really all that we need because all I need is this PLA print get an environment that is about 100 degrees for an hour and when it's done I'm gonna compare these two steaks if the one that was in the air fryer is easier or harder to break okay so I've left it in there for about an hour and now I let it cool down so it actually isn't bending already because it was in the heat it actually started bending by itself and also because it was spinning in the air fryer so now let's see if it's actually harder to break than the previous one that was really easy now let's see the second one well this hack doesn't work on this small part I know that heating up prints actually works but I just don't have the gear to try it out myself but I would highly recommend if you have the oven and the specified things to do it I would definitely recommend trying it out Easy Support Settings (Hack 1) this one says that he can get the perfect support removal just with one trick and he says that the whole magic is in the top Z distance of the support so I made the exact same model as he had in the video and all he says you need to do is you need to enable the supports and then just scroll down to a defense where you find the top Z distance and instead of leaving the 0.2 there you will put there 0.275 slice the plate I'm printing this with my Bumblebee 1S so hopefully there are no issues these hacks seem completely unreal because we just changed the number by 0.075 so will this actually work okay so the print just finished so let's see what it does right now it looks absolutely normal so let's see if it's actually easy to take off Ho ho ho ho ho ho OK I actually didn't expect that that's absolutely amazing and this hack actually works Easy Support Settings (Hack 2) and to compare I actually found another one that says the exact same that the supports will be super easy to take off and will leave a perfect finish and they do show how amazing it is to use it I'm gonna be trying the exact same model but with their settings they recommend using the tree as well but instead of the default style they are using the tree slim then when you scroll down set the top interference layers to free and that's it so let's slice it and print it since the first one set the expectations extremely high and was super easy to take off let's see what this second one that I 3d printed can actually do as you can see because we use the three slim supports they actually kind of reduce the volume of supports needed for the part so let's see huh okay it's not going as well as the first one but we'll give it a chance so it wasn't as easy as the one before but it still kind of work now let's compare the surfaces under the supports this is the first one as you can see it's kind of rough this is the second so when you compare it and so when you compare it I think the second one actually gave even the better result so yes the first one was easier to take off but the second one gave us the better results so I would say that the second one is even better Hiding Layer Lines (Adaptive Height) the next hack says that I can completely remove the layer lines from my 3D print it was liked by 50,000 people this is obviously ugly so let's try to fix it and what this hack recommends is clicking on the model and going into these stack layers it's called variable layer height once you click on it you will see this window right over here gonna scroll the quality completely down and then click on adaptive so this one button should solve it so let's see if it worked now as you can see the layer lines aren't completely hidden but it's so much better I would say that this hack definitely gets approved highly recommend because it does increase print time but it gives the quality that we want