About this video
Video by Vitek Innovation: Instagram Profile
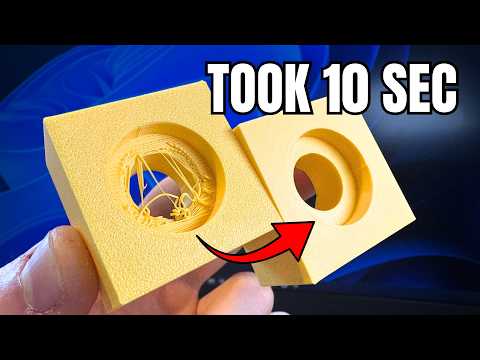
Why Your 3D Prints Look Ugly: The Bridge Problem
If your 3D prints look stringy, saggy, or messy between two upright surfaces, the culprit is almost always your bridge settings. Bridging happens when your 3D printer extrudes filament across an empty gap between two already-printed points. Getting this right eliminates the need for wasteful support structures and dramatically improves overall 3D print quality.
The Custom Bridge Test Model
Before tweaking slicer settings blindly, print a simple bridge test model. A calibration model lets you compare settings side-by-side on your specific printer, since results vary between machines, nozzles, and filament brands. Start with the recommended values below, then fine-tune from there.
Key Bridge Settings to Adjust
- Cooling (Part Cooling Fan): Set to 100% during bridging. Maximum airflow helps filament solidify instantly, keeping the line taut instead of drooping.
- Printing Temperature: Drop your normal print temperature by 5–10°C during bridges. Cooler filament is stiffer and less prone to sag.
- Bridge Flow Ratio: Controls how much plastic is extruded.
- Long bridges (30mm+): Increase flow to around 1.5 — extra material gives the nozzle something to "catch" on across the gap.
- Short bridges (under 30mm): Lower flow to 0.7–0.8 to avoid blobs and over-extrusion.
- Bridge Speed: Slow it down. Around 10 mm/s gave the best results in testing, giving the filament more time to cool mid-air.
- Fake Bridges: A newer slicer feature for gaps above 70mm. It treats the span as multiple short bridges, drastically improving success on long overhangs. Enable it if your slicer supports it.
Step-by-Step Workflow
- Download or design a simple bridge test model.
- Apply the baseline settings (cooling 100%, temp −5 to −10°C, flow 1.5 for long / 0.8 for short, speed 10 mm/s).
- Print and inspect the underside of each bridge for sagging, stringing, or gaps.
- Adjust flow and speed in small increments until bridges are clean and flat.
Frequently Asked Questions
What is a bridge in 3D printing?
A bridge is a horizontal span of filament extruded between two printed points with no support directly beneath it.
What is a good bridge flow ratio?
For long bridges, 1.5 works well; for short bridges, drop it to 0.7–0.8.
How fast should bridges print?
Slower is better. 10 mm/s is a reliable starting point for clean bridges.
Do I need supports for bridges?
With optimized bridge settings, you can often eliminate supports entirely, saving filament and print time.