About this video
Why AI-Generated SVG Textures Are a Game-Changer for 3D Printing
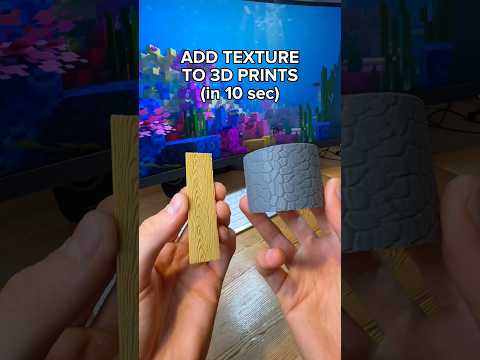
Adding surface texture to a 3D print used to mean learning CAD software, sculpting digital clay, or relying on expensive plugins. Today, a much faster workflow exists: ask an AI image generator to create a black-and-white SVG pattern, then import it directly into your slicer as a printable surface. The result is a custom embossed or debossed texture mapped exactly to the footprint of your model—no manual mesh editing required.
Step-by-Step: Adding an AI SVG Texture to Your 3D Print
- Generate the pattern with AI. Prompt your favorite AI tool (ChatGPT, Claude, Midjourney, etc.) to create an SVG texture of your chosen pattern. Specify the exact surface dimensions in millimeters and request that the output use only black and white, since slicers interpret these as raised and recessed areas.
- Download the SVG file. Save it locally so you can import it into your slicer software.
- Import into your slicer. Open your slicer (Bambu Studio, PrusaSlicer, OrcaSlicer, and similar tools all support this workflow). Go to the object menu and select Add Part → SVG.
- Position the texture. Use the Use Surface button to snap the SVG onto the top face of your existing 3D model. This automatically aligns the pattern to the correct surface size.
- Adjust the height. Increase or decrease the texture depth to control how prominently the pattern stands out from the surface. A height of 0.2–0.6 mm works well for most decorative textures.
- Change the color (optional). In the Object menu, assign a different filament color to the texture part so it prints as a multi-material accent.
- Slice and print. Preview the result, then send it to your printer.
Tips for Best Results
- Keep patterns high-contrast. Pure black-and-white SVGs translate most reliably into clean raised/recessed geometry.
- Match units carefully. Tell the AI the exact width and depth in millimeters to avoid rescaling.
- Test with a small swatch first. Print a 20×20 mm test tile before committing to a full build.
- Use fine nozzles for detail. A 0.2 mm or 0.25 mm nozzle captures intricate AI patterns far better than a standard 0.4 mm.
- Consider infill overlap. Slicers usually handle the interface between texture and base model automatically, but check the preview for gaps.
Frequently Asked Questions
Can any slicer import SVG textures?
Most modern slicers based on the PrusaSlicer/Bambu Studio lineage support SVG import natively. Check your slicer's documentation under "Add Part" or "Negative Volume."
What AI tools work best for generating SVG patterns?
Text-based AI assistants like ChatGPT and Claude can output clean SVG code directly. Image generators can also work, but you'll need to vectorize the output before importing.
Can I use color in the SVG?
Technically yes, but slicers typically only interpret the geometry, not the color. Stick to black-and-white for predictable results, and assign colors inside the slicer instead.
How tall should the texture be?
Start with 0.4 mm for subtle patterns and go up to 0.8 mm for bold, tactile designs. Anything above 1 mm may require support material depending on the geometry.