1.1 Subscription plan selection
Before you can run the PrintWatch plugin on OctoPrint, you must have an active API access key for the amount of printers you intend to run the software on. If you already have your API access key or you are using a FREE plan, skip this step and jump to section 2.1.
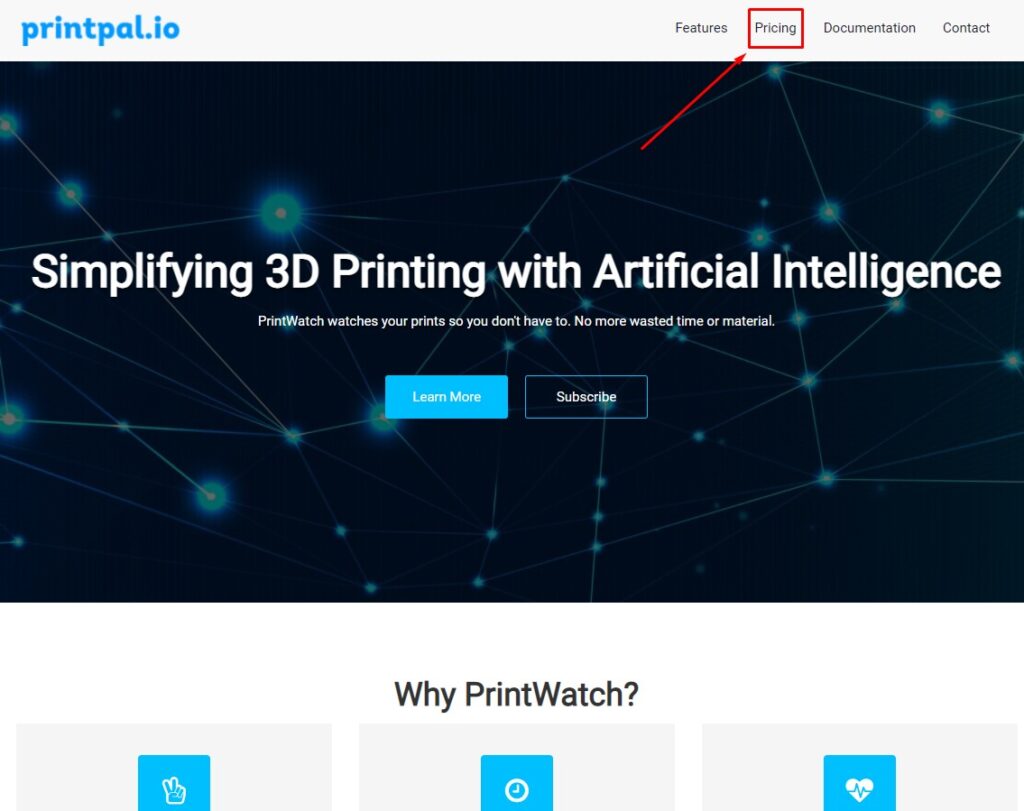
From the printpal.io homepage, navigate to the ‘Pricing’ page from the top header bar as shown in the screenshot below and familiarize yourself with the pricing options. If you are having trouble finding the pricing page you can also click here to be redirected to it.
1.2 Checking out
Once you have familiarized yourself with our pricing options and are ready to checkout, click the ‘Subscribe’ button (if using PrintWatch Premium, otherwise the ‘Contact us’ button). You will be redirected to the official checkout page. If you are having trouble finding the checkout page, you can also click here to be redirected to it.
The pricing for PrintWatch Premium is:
- $9/month for the first printer
- +$4/month for every additional printer
By subscribing to PrintWatch premium, every printer has unlimited usage of the software. It is not metered or throttled down if you are using it too often. The subscription does not bind to a certain printer either, meaning if you subscribe to PrintWatch with 1 printer, you can transfer the API to a different printer with no issue. You will just be limited to running the software on 1 printer at a time.
There are two subscription intervals for PrintWatch:
- Monthly
- Anually
By choosing the Annual subscription cycle, you save 30% on your PrintWatch subscription.
Once you’ve chosen the subscription plan that fits your needs, read the terms of use and then click the check mark indicating that you accept the terms of use. Click on the ‘Subscribe’ button and you will be redirected to the official stripe checkout page.
1.3 Confirmation
Once you have successfully checked out via stripe, you will receive a confirmation email containing your API access key. If you are having trouble finding the confirmation email, check your spam inbox. The confirmation email may take a few minutes to arrive.
Your confirmation email should look like this:
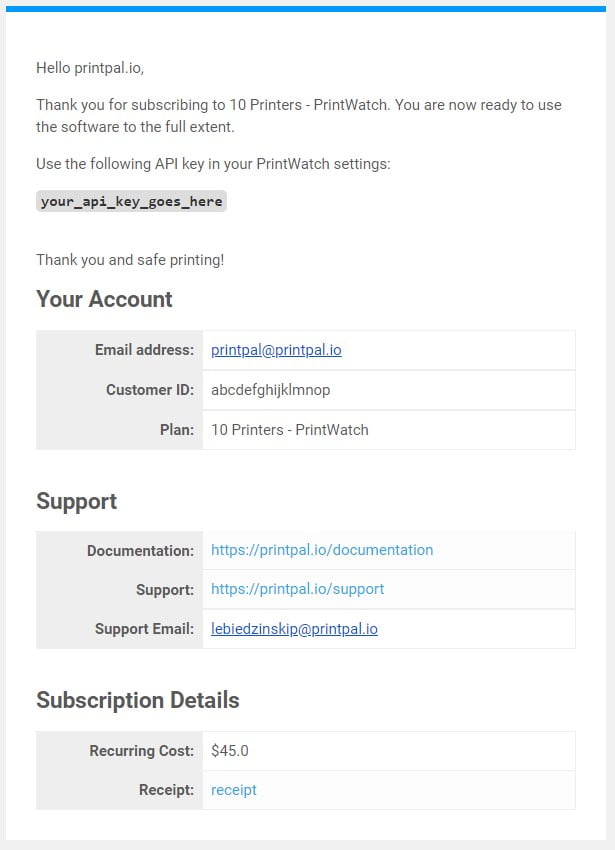
Remember the API key provided in the email confirmation, it will be used in step 3.1 to authenticate your PrintWatch plugin. If you have a multi-printer subscription plan, the same API key will be used for all of the printers. Note that If you are signing up for a free trial, the ‘Subscription Details’ of your email confirmation may show a cost of $0 or the price of your plan selected, rest assured that you won’t be charged until your free trial is over.
2.1 Installation
Installation of the PrintWatch plugin requires a properly installed OctoPrint instance on your device. Please follow the OctoPrint Installation Guide before continuing with the following steps.
Once you have successfully installed OctoPrint and are running it on your device, follow the Official OctoPrint Plugin Installation Guide or the following steps:
- Go to the WebUI of your OctoPrint instance. This can be done by typing http://octopi.local or http://<your device ip address> into the web browser. The standard address for a local device is http://127.0.0.1. If you are trying to access the WebUI of an OctoPrint instance running on a different device, use that devices IP address.
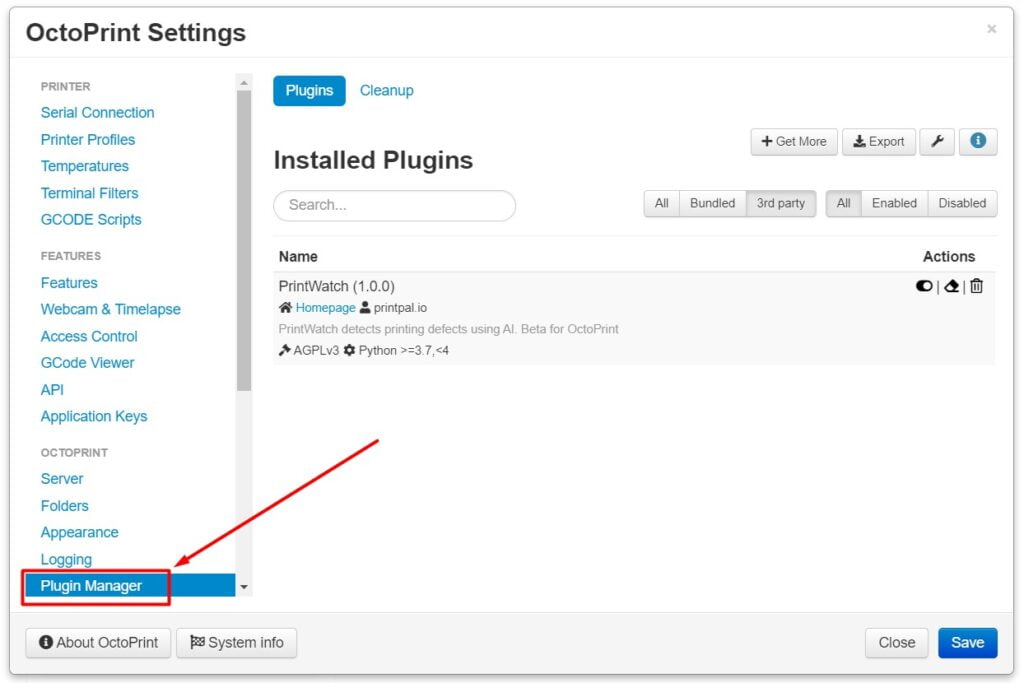
- Once you are on the OctoPrint WebUI, navigate to the settings window and scroll down the left toolbar until you find the ‘Plugin Manager’ (shown below):
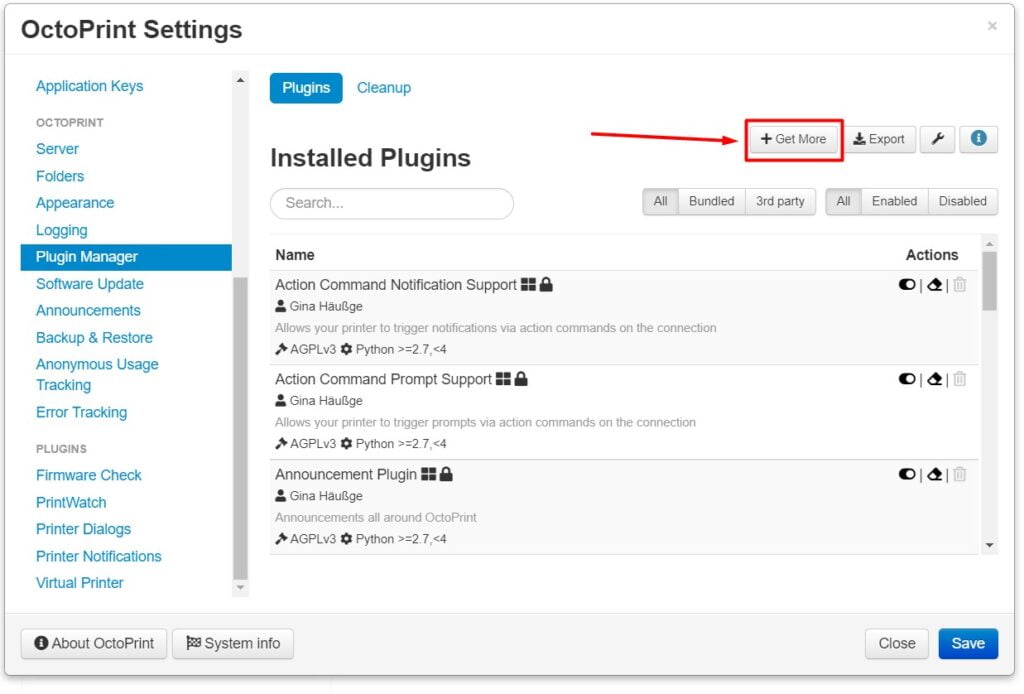
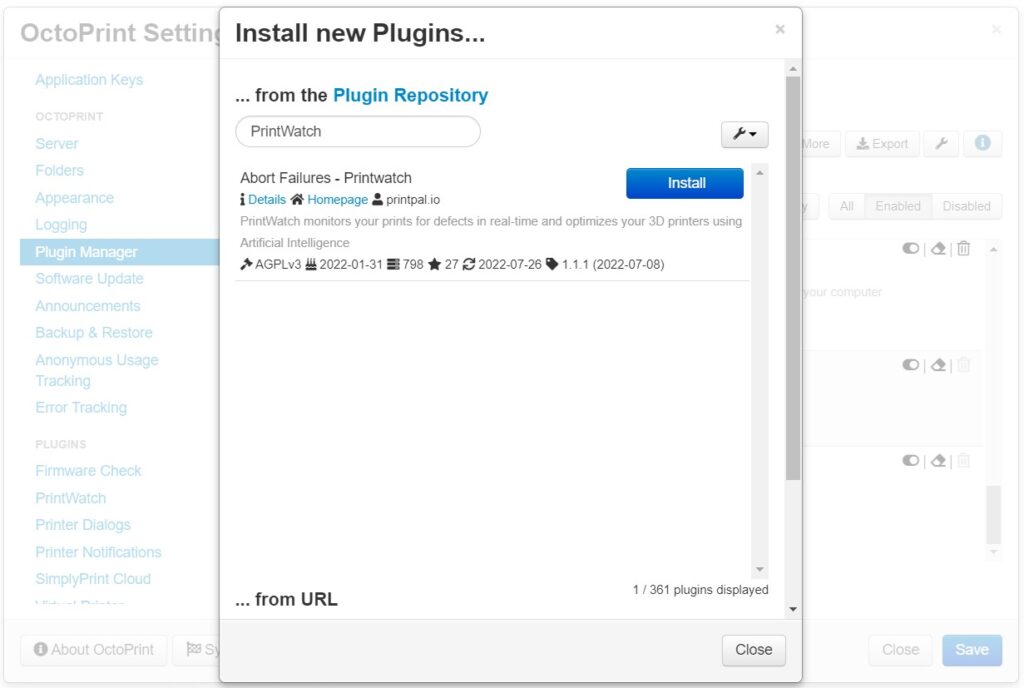
- Once the Plugin Manager is open, Click on the ‘Get More’ button in the top right corner to open the Plugin Repository search tool (shown below):
- Type ‘PrintWatch’ into the search input and click ‘Install’ on the first item in the response (shown below):
Once the Plugin has finished installing, you will see the following pop-up notification:
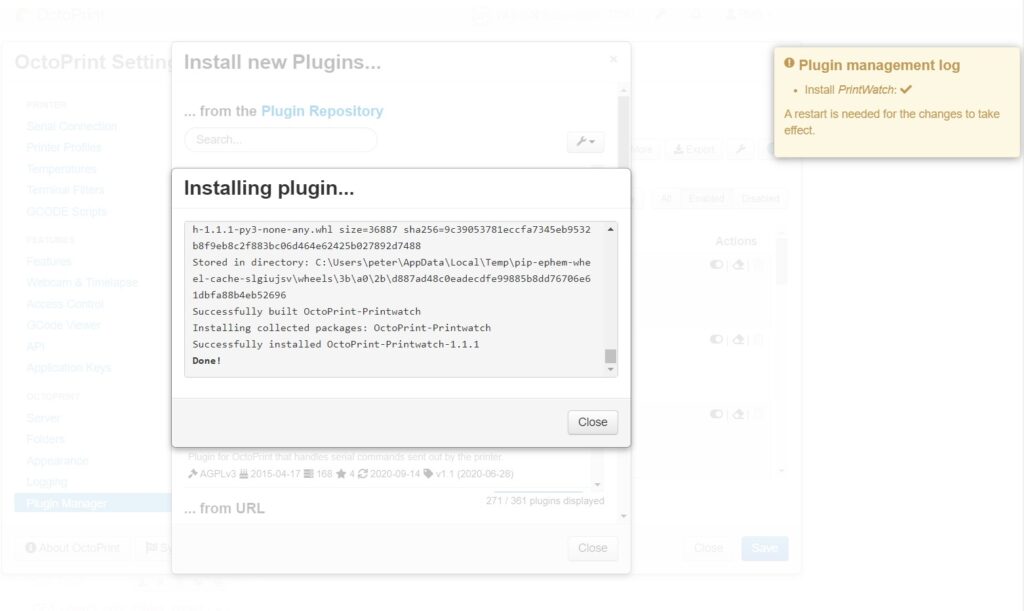
Restart the OctoPrint instance an you are ready to use PrintWatch.
3.1 Activation and Settings
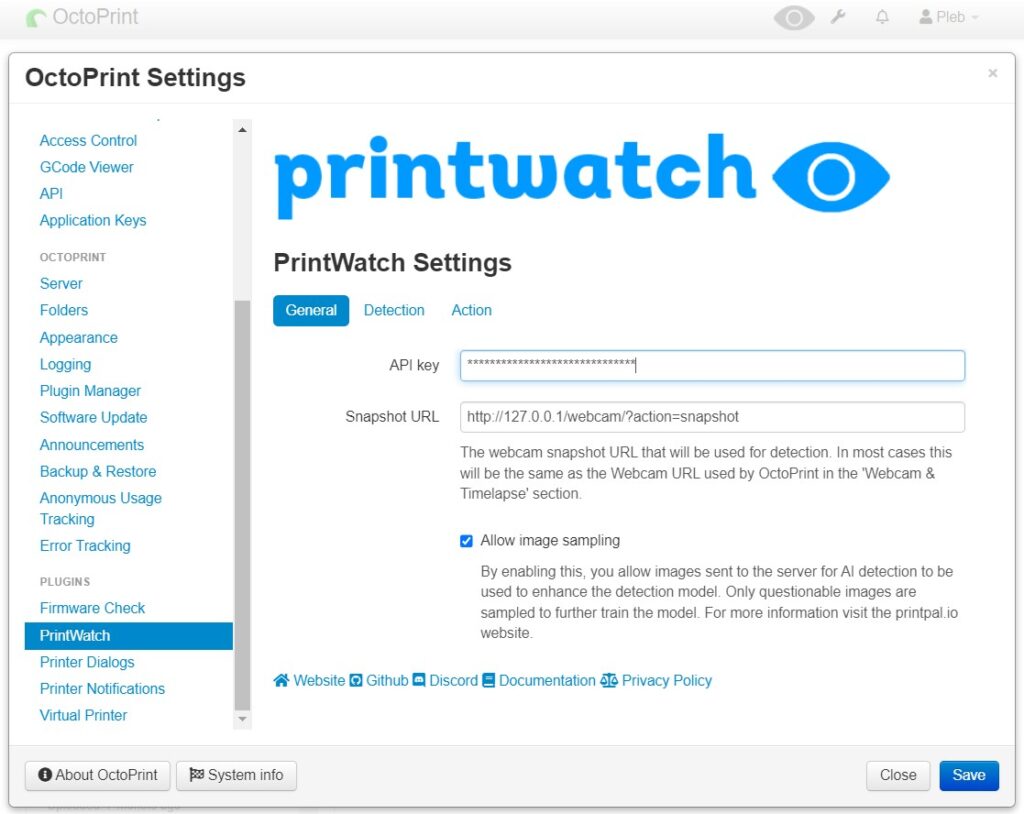
- Once you have successfully installed the PrintWatch plugin, open the settings window in the OctoPrint WebUI and scroll all the way down the left toolbar until you reach the ‘Plugins’ section of the settings. Click on the ‘PrintWatch’ option to enter the settings page (shown below):
- Copy your API key from your confirmation email (see step 1.3 above). If you are using a FREE plan, you can find your API key by logging into the Web Application and navigating to Settings->API key (Section 4.1 for more information). Paste the code into the ‘API key’ input of the settings page (shown below):
- Once you have input your API key, you are authenticated and ready to use PrintWatch. It is highly recommended to configure the remaining settings according to what actions you would like to take place in the event of a print failure.
- The settings and their meanings are generalized below:
- Snapshot URL: The stream address of the camera that will be used for analyzing the print job (default: http://127.0.0.1/webcam/?action=snapshot, which will use the local devices OctoPrint webcam). In most cases the default setting will work, however if referencing an external device’s camera, then use that device’s address. Versions of PrintWatch prior to 1.1.1 will use the webcam streaming endpoint. If you are using a version of PrintWatch < 1.1.1, please use http://127.0.0.1/webcam/?action=stream
- Enable Detection System: Toggle whether PrintWatch is running (default: TRUE, meaning PrintWatch will be running analysis on your print).
- Send Email on Detection: Toggle whether Emails will be sent when the Notification threshold or the Action Threshold are reached (default: FALSE, meaning no email will be sent).
- Email Address: The designated Email address to send notifications to in the event of a print failure (default: Empty, meaning no address will receive an email).
- Pause Print on Detection: Toggle whether the printer will receive a Pause command in the event of a print failure (default: FALSE, meaning the printer will not receive a pause command).
- Stop Print on Detection: Toggle whether the printer will receive a Stop command in the event of a print failure (default: FALSE, meaning the printer will not receive a stop command).
- Power off Extruder Heater on Detection: Toggle whether the printer will receive a cooldown command for the extruder heater unit in the event of a print failure (default: FALSE, meaning the printer will not receive a cooldown command).
- Detection Threshold: The threshold at which detections will be classified as defects. This setting can be considered as the sensitivity of the detection model. A lower value results in the detection system being more sensitive and more likely to classify something in the video as a defect. A higher value results in the detection system being more strict as to what it classifies as a defect (default: 60, meaning any items the model detects that are above the 60% threshold will be classified as a defect). Each printer is different, so the default value may not work for you. Please refer to the Tuning your Setup document to understand how to properly decide a confidence setting value.
- Notification Threshold: The threshold at which a notification will be sent to the user. This setting will be drawn on the live plot as a horizontal line, indicating the level at which the notification will occur. Note that by changing the PrintWatch settings or pausing/stopping the print will reset the counter for sending another notification.
- Action Threshold: The threshold at which actions will be sent to OctoPrint to perform on behalf of the printer. The actions currently available are: pausing the print, stopping the print, turning off the extruder heat. If the notification setting is enabled, a notification will be sent notifying of actions taken.
- Buffer Length: The size of the buffer to use when tracking the last N detection results. The buffer stores the detections as either True or False, indicating whether or not a defect was detected. The buffer is used in determining when a shutoff event should occur. Increasing the length of the buffer will typically make it take longer for PrintWatch to take action, while lowering the length of the buffer will make PrintWatch take action faster, but being lowered too much may cause false shutoffs.
- Buffer Percent: The percentage of positive detections in the buffer that will trigger a shutoff event. Increasing this value will require more of the buffer to have positive detections in order to trigger a shutoff event. When tuning settings, the approximate time until PrintWatch intervenes can be calculated with: 10 * Buffer Percent * Buffer Length, where Buffer Percent is a value from 0.0 – 1.0. The total time is in seconds. As of version 1.1.1, this setting is depreciated.
- Send feedback images to enhance the detection model: Toggle whether feedback images will be sent to the model training system to be used for training, resulting in a more accurate defect detection model (default: TRUE, meaning qualifying images will be used to enhance the detection model). Disclaimer: Images will only be used in the model training system. Images are sampled when a highly positive defect is detected only when the system is enabled and the printer is in a ‘printing’ state.
Once you have input your settings, you are ready to use PrintWatch. Start a print and notice the status indicator on the OctoPrint navigation bar begin to flash green. This indicator means that PrintWatch is actively monitoring your print. Go to the PrintWatch tab in OctoPrint to get a live view of what the Machine Learning model is seeing on your print. For more information regarding tuning or setting up your printer with PrintWatch, refer to Tuning your Setup. Additionally, follow the Calibration Checklist to setup your printer to work best with PrintWatch.
4.1 Web App
The Web App allows you to view and manage each of your printers that are running PrintWatch. The Web App is accessible anywhere in the world, meaning you do not have to be on the same network as your printers to use it. Use the Web App by visiting the URL provided in your subscription confirmation email.
4.1.1 Web App Registration
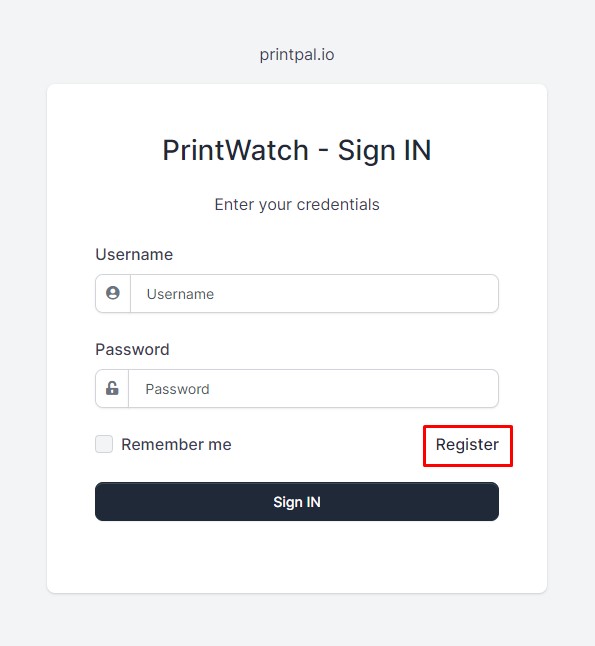
If you do not already have an account for the Web Application, click on the “Register” button on the main login page:
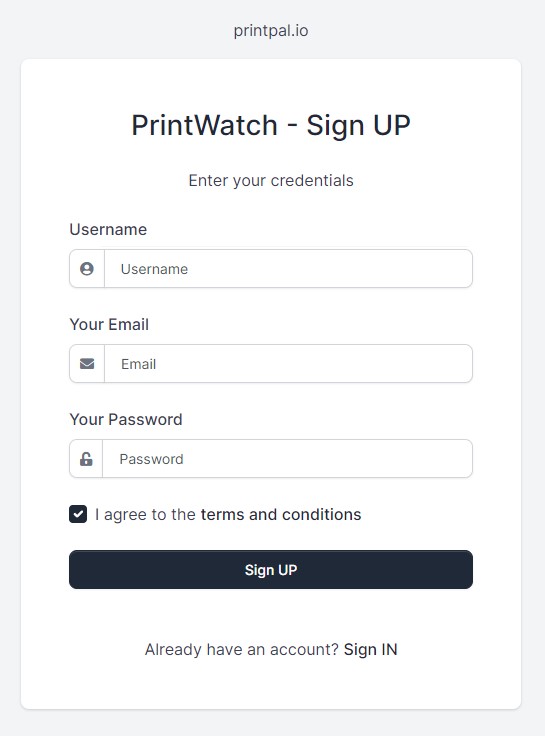
You will be redirected to the registration page. Once on the registration page, enter your desired username, email, and password.
Once you have registered an account, you are able to login and manage your printers. Go back to the main login page and sign in using your credentials
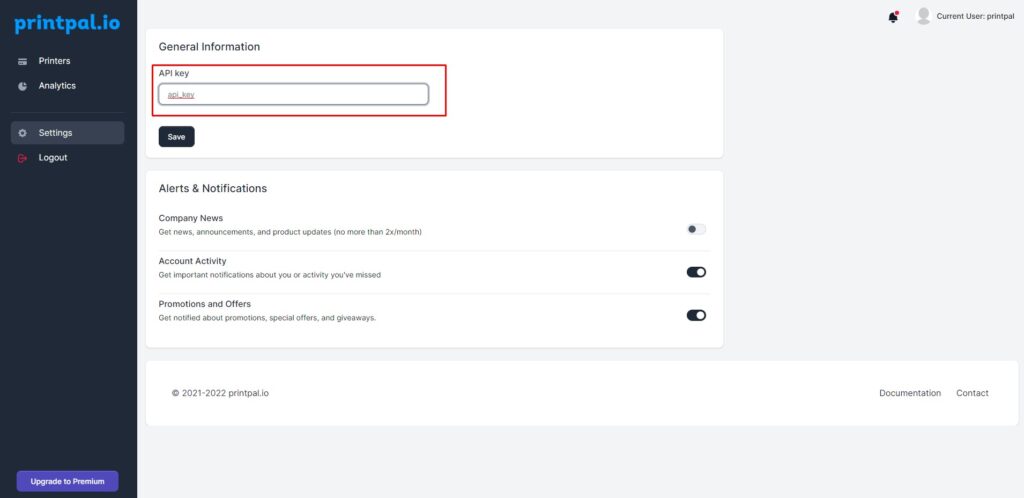
Once you have signed into the Web Application, you must enter your API key into the settings in order to view and manage your printers. If you are using a FREE plan, your API key will be automatically populated in the Settings -> API key section of the Web Application, and this is the API key you will use for OctoPrint. To find the API key, navigate to the “Settings” tab via the sidebar on the main page.
Enter your API key into the “API key” input field of the General Settings panel and click the “Save” button as shown:
4.1.2 Main Web Application Page
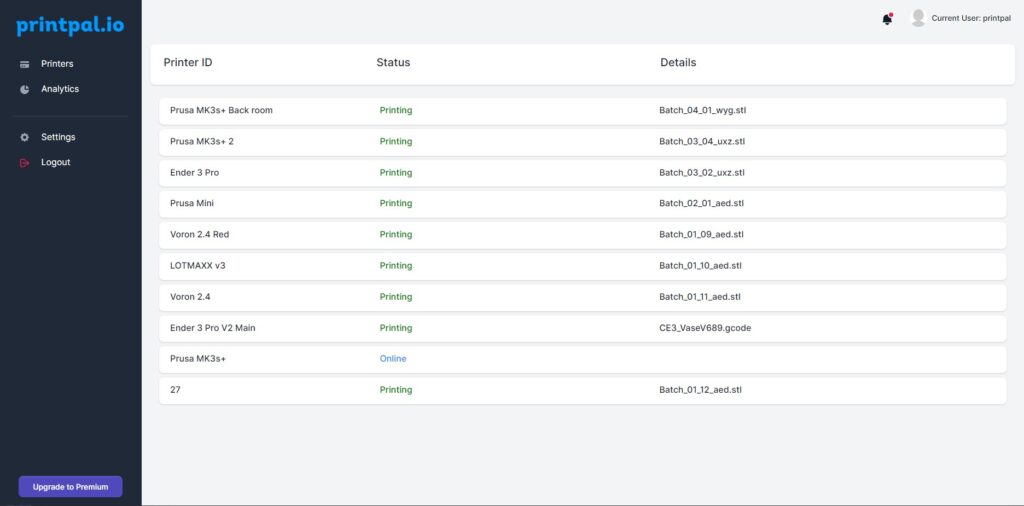
Once you have successfully entered your API key, all of your printers that are currently online will show up on the main web application page, as shown below:
The main web application page lists all of the printers, their states, and a description. This page does not auto-refresh, meaning any new printers that have been added or any changed states will require a page refresh to show up. Some changes may take up to 30 seconds to show up.
4.1.3 Individual Printer Page
You may access any printer by clicking on it in the main web application page and you will be redirected to the individual printer’s management page, as shown below:
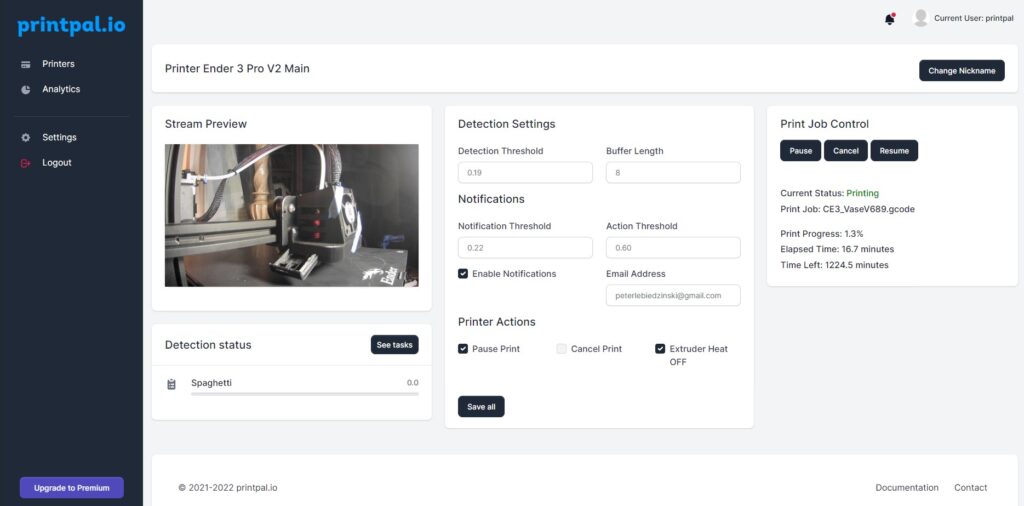
The individual printer page has five main elements:
- Name section: this is the top section that displays the Printer ID or Nickname of the printer. You may add/change the nickname of the printer by clicking the “Change Nickname” button. This will not alter the printer ID of the printer, but it will give the printer a human-readable name. Updating the Nickname will update the display name of the printer on the main web application page.
- Stream preview: this shows a preview of the webcam stream of the printer. Currently, it updates every inference cycle (approximately every 10 seconds), and does not draw the AI detections (this option will be added in version 1.2.2). If the Printer is not in the “Printing” state, the preview will be blank.
- Detection status: this shows the AI detection level for the various defect types (currently only supporting a “spaghetti” type defect). This is the same detection level on the printer’s OctoPrint tab. This detection level is used in determining whether a notification is to be sent or an action is to be taken by the printer, which can be controlled using the “Action Threshold” and “Notification Threshold” settings.
- Detection Settings: these are the same settings as the ones input to the OctoPrint plugin. You may make changes to the settings on the Web Application and they will be reflected in the OctoPrint plugin. A refresh of the OctoPrint WebUI may be required for some of the settings to properly display.
- Print Job Control: this displays information about the current print job in addition to allowing you the send actions to the printer. Changes may take up to 30 seconds to take effect.