Slab eyes

A pair of cartoon eyes in a tiny printed case. They look around, blink, wink and doze off all by themselves. Print two parts, click in an ESP32-C6 screen, and learn how timers and maths make a screen feel alive.

DifficultyBeginner
Build time45 min
Est. cost$18
Parts4
Files8
Steps13

Things you'll need

QtyPartType
1
Waveshare ESP32-C6-LCD-1.47 board
Waveshare ESP32-C6-LCD-1.47 board The brain and the 1.47-inch screen in one board, with a tiny BOOT button. No touch, no soldering.
electronics
2
Printed parts
Printed parts Frame and back lid. Both are in the 3MF below on one plate, no supports.
printed
1
USB-C data cable Powers the board and loads the program. It must be a data cable, not a charge-only one.
electronics
10 g
PLA filament Black or any dark colour makes the eyes pop. Any PLA works.
consumable

Tools & software

1
Chrome or Edge browser Loads the program onto the board straight from this page. Nothing to install.
1
Arduino IDE (optional) Only needed if you want to change the code later. See 'Level up' at the end.

Files & downloads

Download all

Flash writes a precompiled image over USB-C in Chrome or Edge. The .ino below is the source — you do not need Arduino IDE unless you want to change the sketch.

What you're building

A pair of eyes that live on your desk. They glance around, blink, wink, get curious, go dizzy, and nod off when nobody plays with them. Poke the button and they jump, then grin.

No soldering. No wires. You print two parts, drop in one board, press on a lid, plug in one cable, and click one button on this page to load the program.
Note

There is no camera and no microphone. The eyes can't see you. All the 'life' is maths and timers: a few random numbers deciding when to blink and where to look. That is the whole lesson, and it is enough to feel like a creature.

What you'll learn

  • How a loop that runs many times a second makes a drawing feel alive
  • How coordinates put two eyes on a 320 × 172 screen
  • How a mood is just a set of numbers: lid height, pupil size, blush
  • How random timers decide when to blink, glance and get sleepy
  • Why this chip is faster with whole numbers than with decimals

Meet the parts

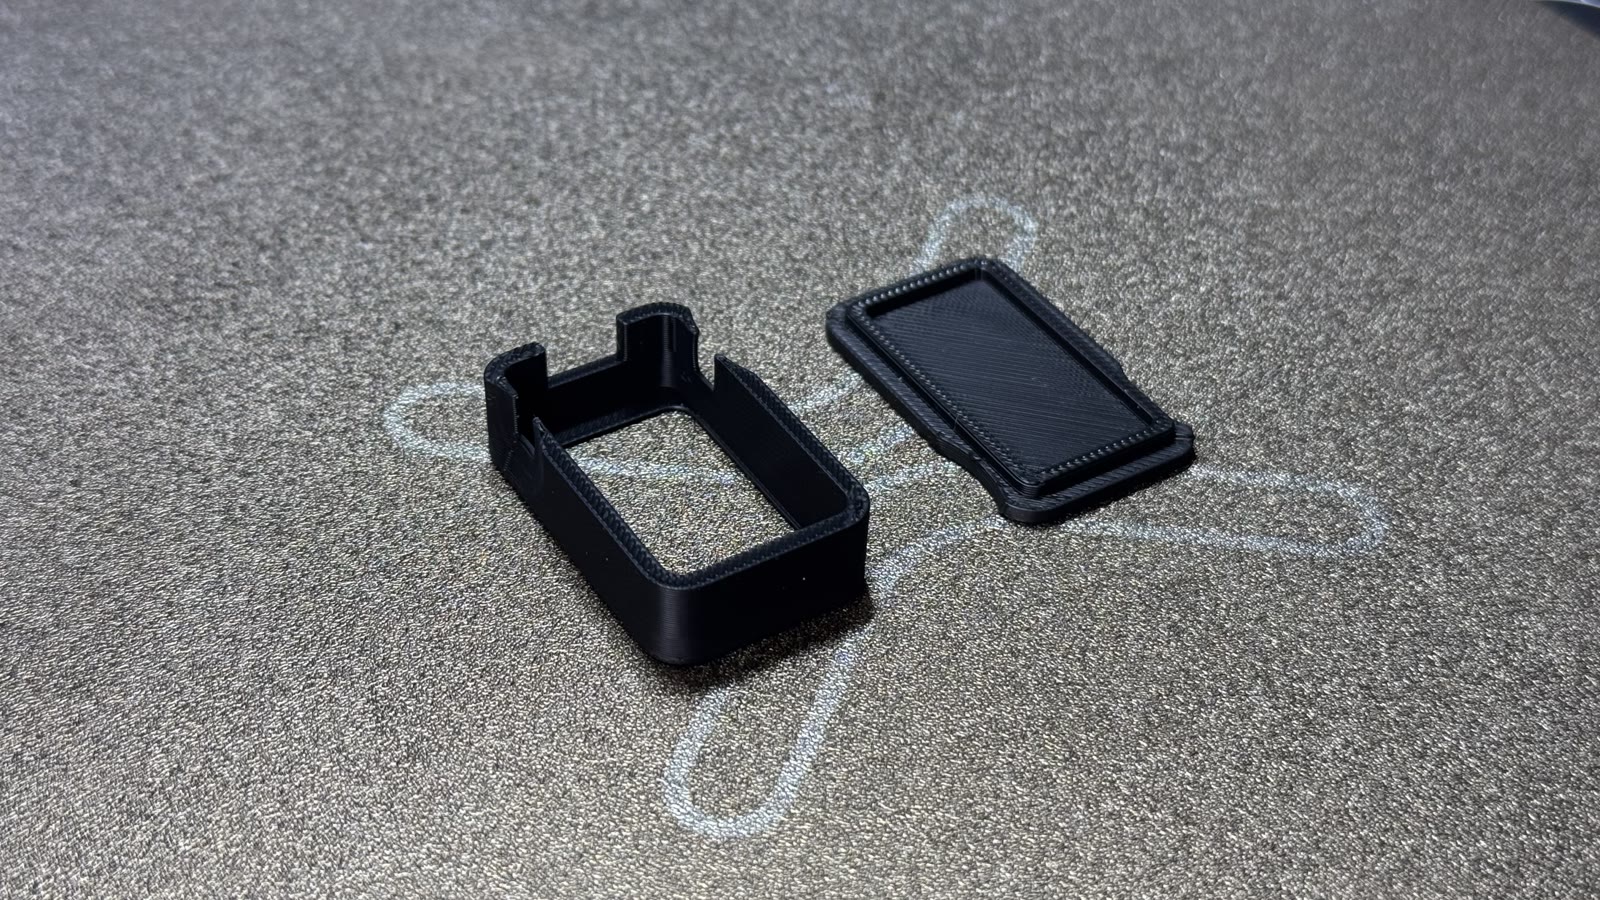
The printed frame and back lid fresh off the print bed
Two printed parts: the frame (left) and the back lid (right). Add one board and you're done.
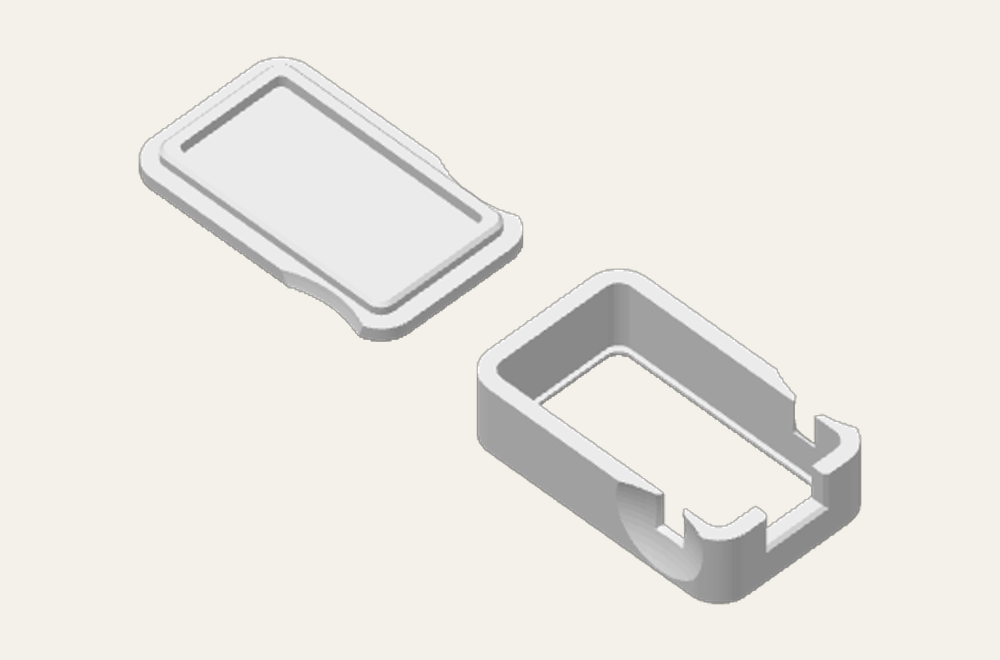
  1. Frame: the ring the screen looks out of. One end has a notch for the USB-C port and two little tabs around the buttons.
  2. Back lid: the flat plate with a raised lip. It closes the back and has a half-moon cut-out for the cable.
  3. The board: a Waveshare ESP32-C6 with a 1.47-inch screen. Brain and display in one.
Tip

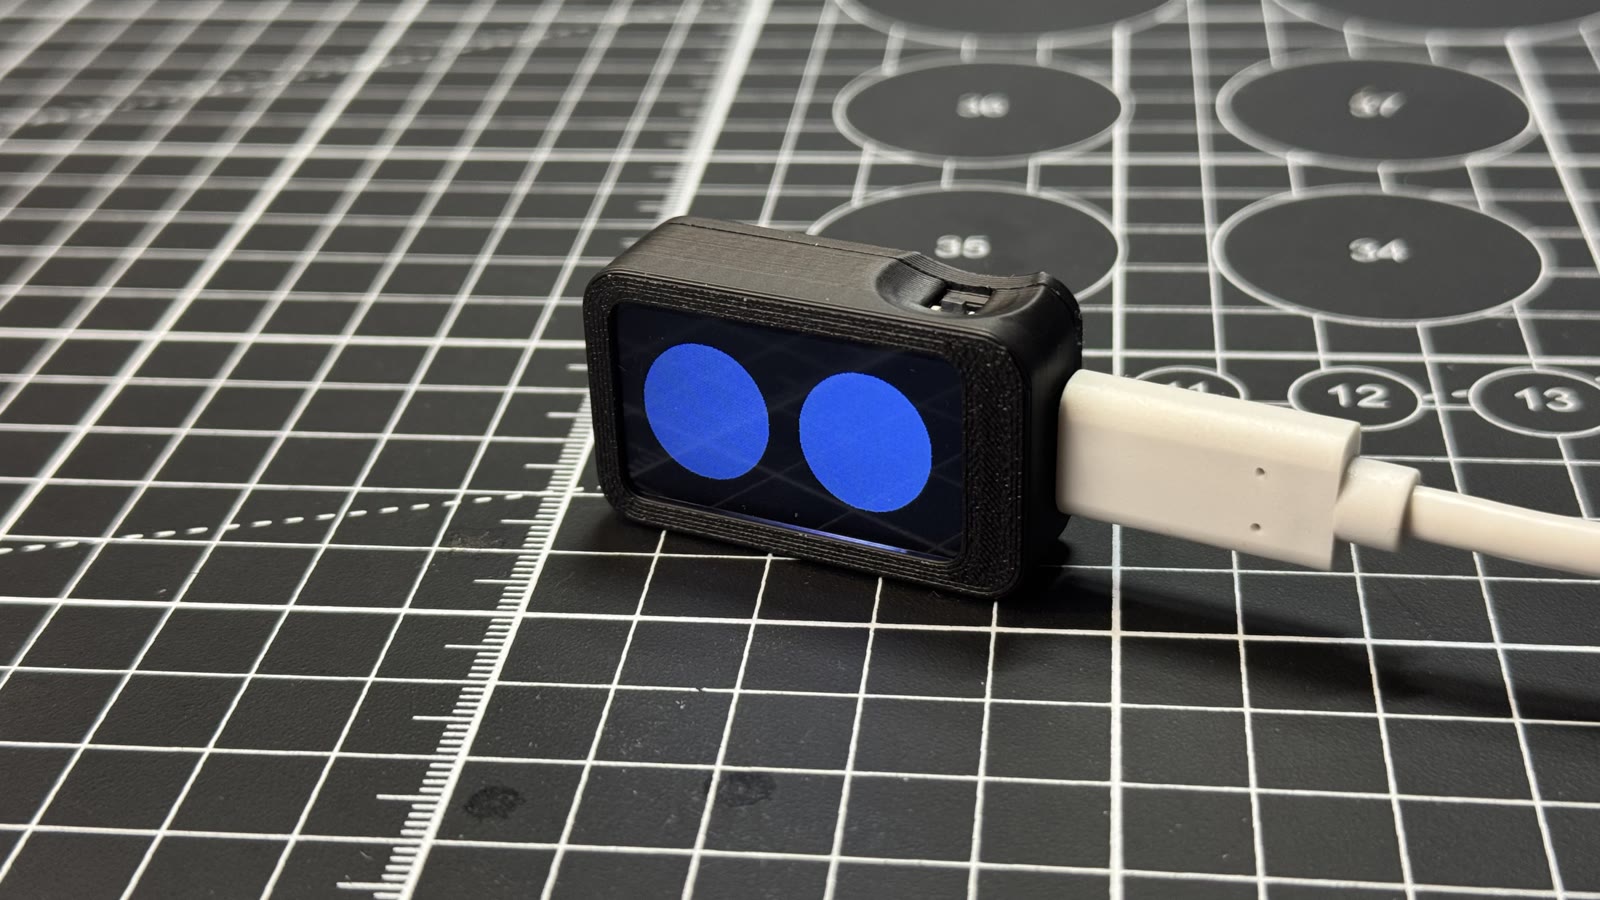
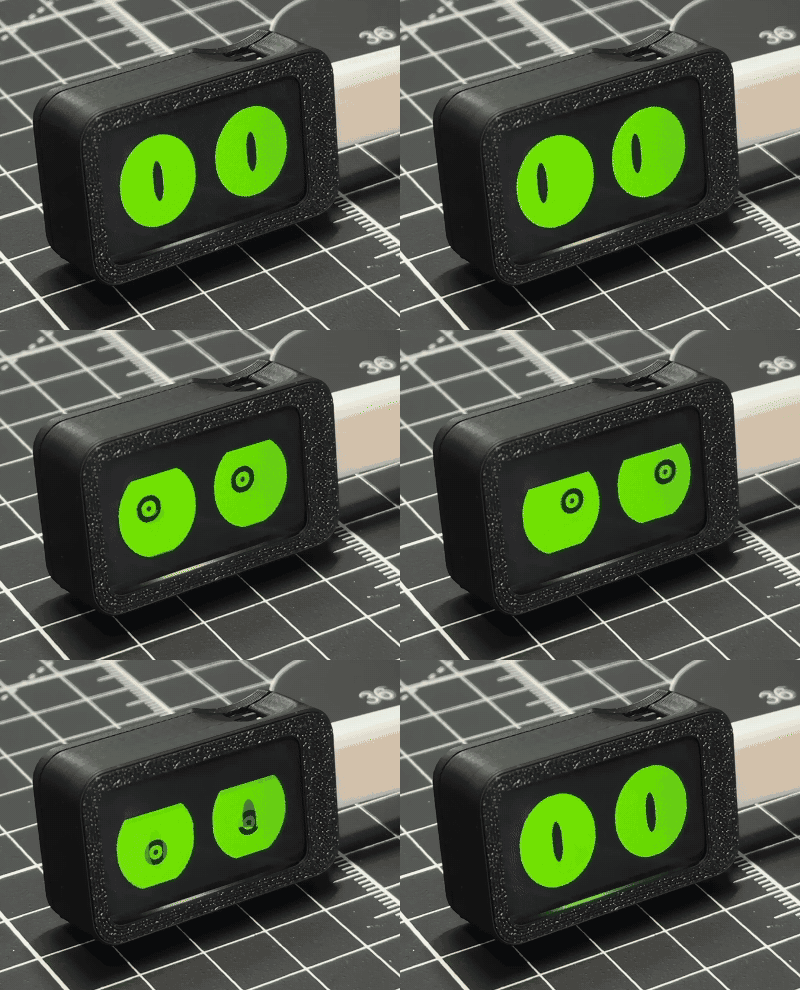
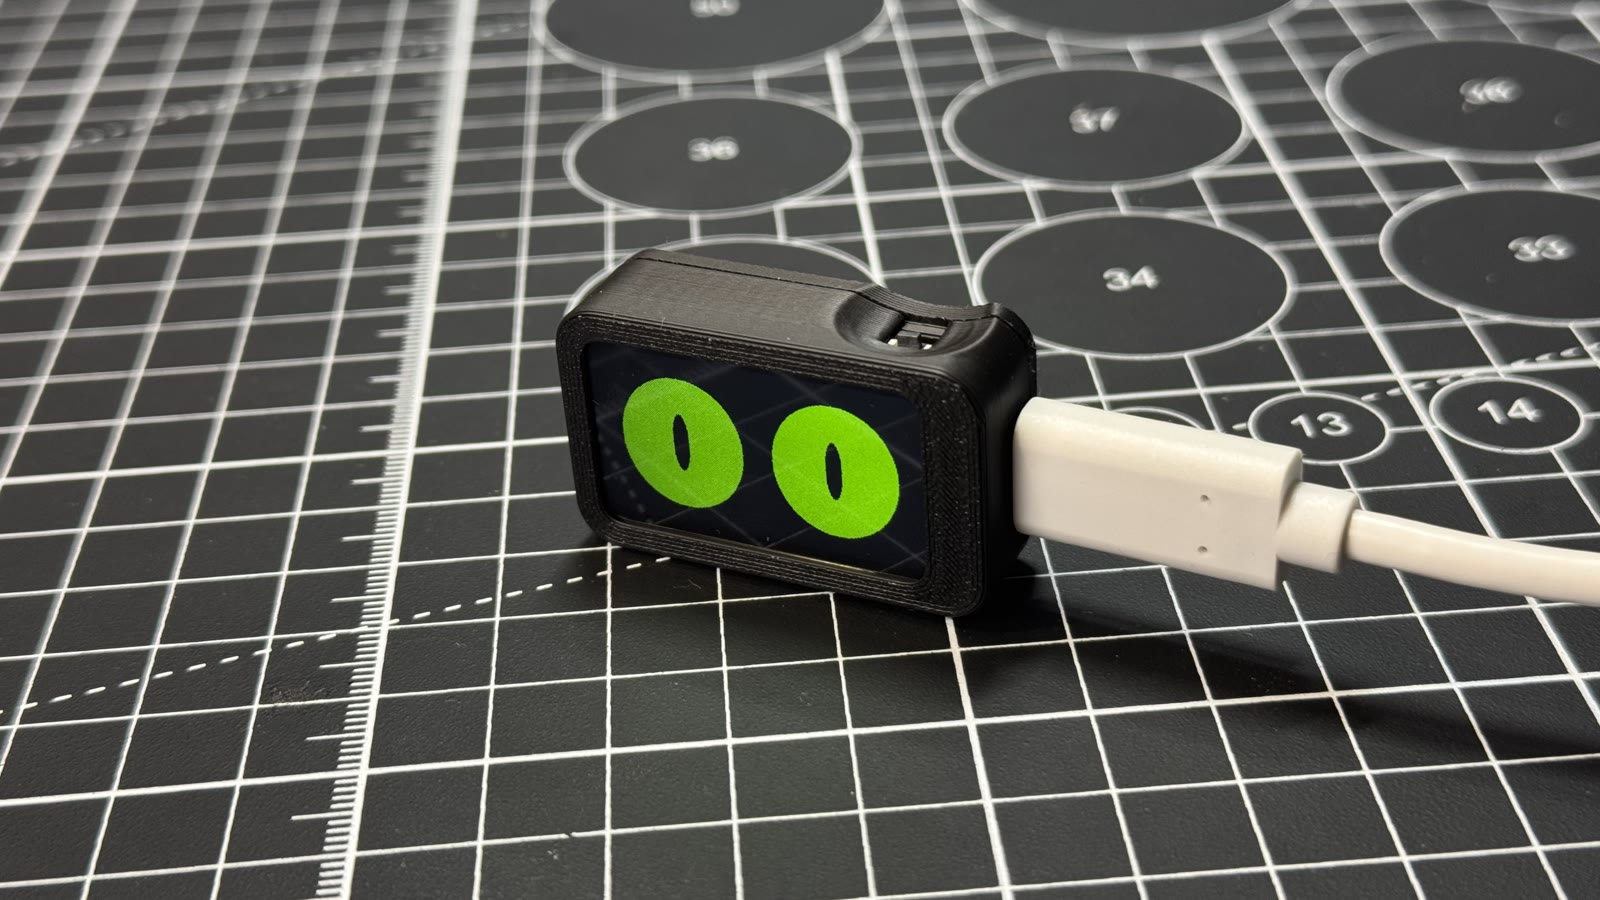
Pick your own colours. The case in the photos is black, which makes the eyes glow. The eyes themselves come in nine looks you can switch with the button. The photos show two of them: glowstick (green with slit pupils) and periwinkle (plain blue, no pupil).

Note

Before you start. The printer does about 40 minutes of work on its own. You do about 10 minutes of clicking parts together and 2 minutes of loading the program. No tools needed.


Part 1: Print

One plate, two parts, one colour. Start the printer, then read Part 2 while it works.

1

Download the 3MF

Grab Print-ready 3MF from Files & downloads above and open it in Bambu Studio. Using another slicer? Open the STL instead; both parts are in it.

Download the 3MF
2

Pick a colour and print

Choose a dark PLA. Settings are already in the file: 0.2 mm layers, 2 walls, 15% infill, no supports. The frame prints as a ring, the lid prints flat.

Pick a colour and print
3

Check the parts

Look at the notch end of the frame. The gap for the USB-C port and the gap between the two tabs must be clear, because the port and the BOOT and RESET buttons go there.


Part 2: Put it together

No glue, no screws. Everything pushes together. If a part feels tight, wiggle it; never force it.

1

Drop the board into the frame

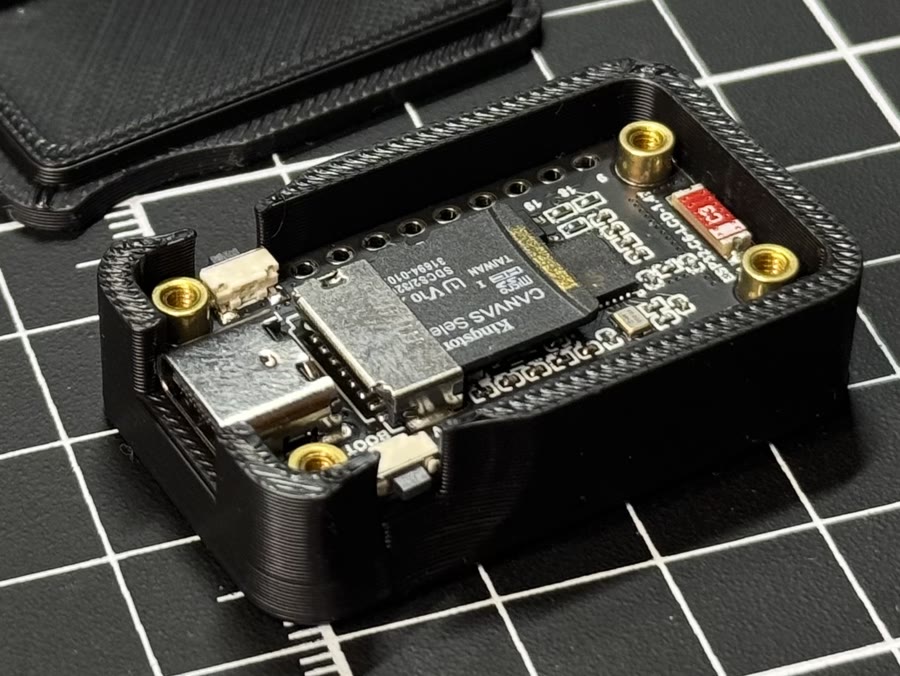
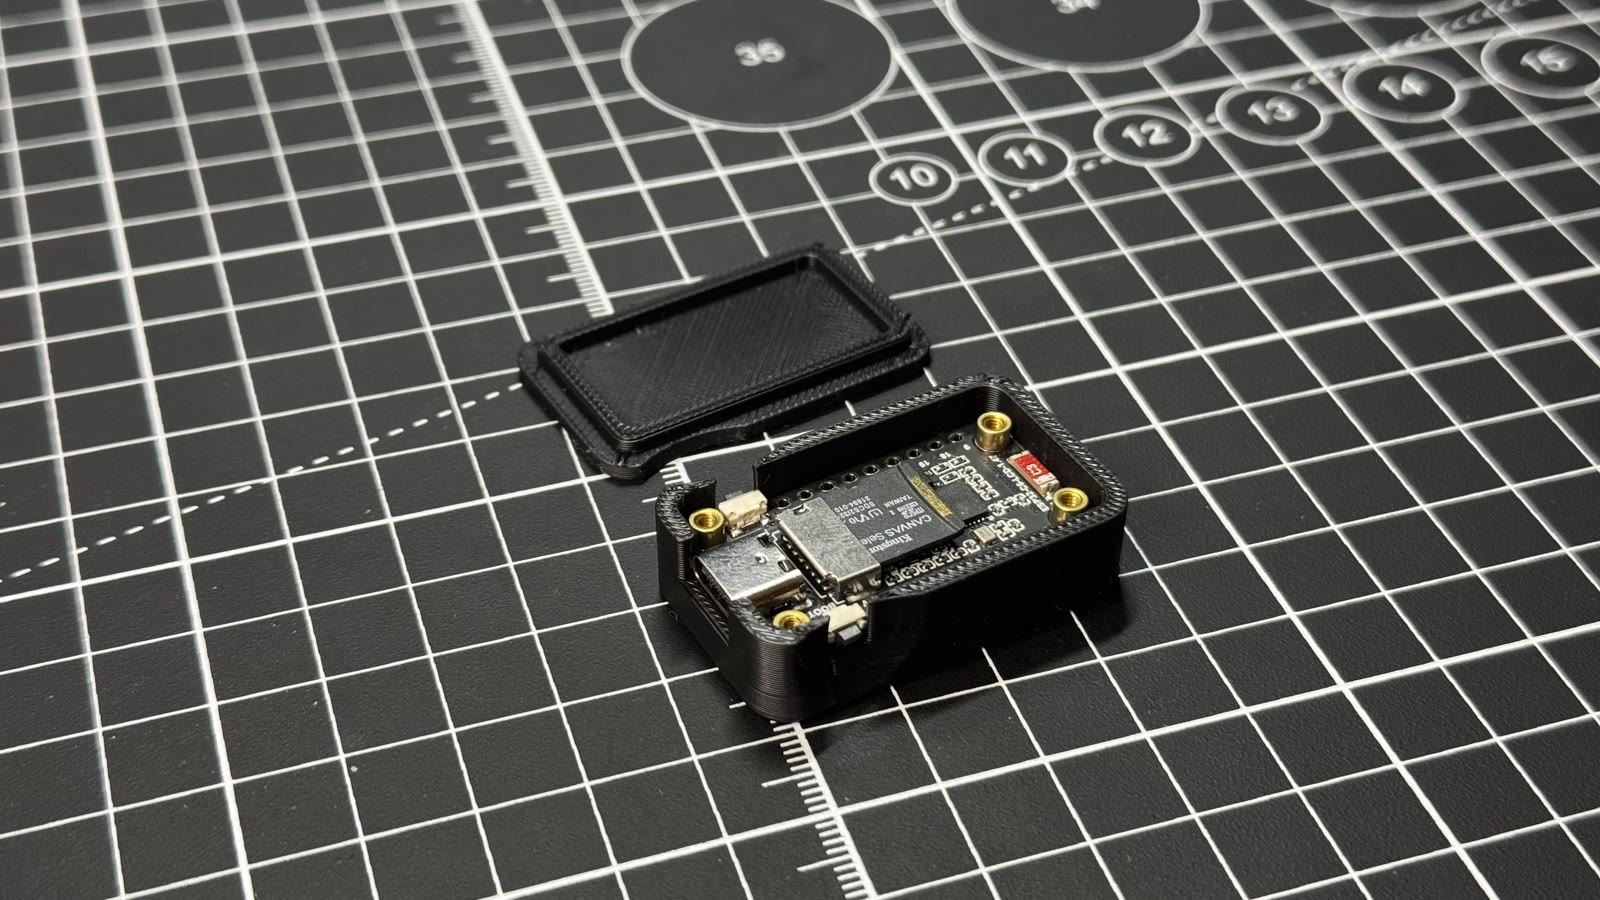
The board goes in from the back, screen facing out. Point the USB-C port at the notch end. The two tiny buttons sit beside the port, right where the frame wall is cut away.

Drop the board into the frame
2

Press on the back lid

Lip side in, half-moon cut-out at the cable end. Line it up and press the edges down until the lid sits flush with the frame.

3

Check the buttons

Turn it over. You should see the two buttons through the gap between the tabs. You will need to reach BOOT with a fingertip or a fingernail.

Check the buttons

Part 3: Load the program

The board arrives empty. You are going to copy the eyes program onto it from this web page. That takes about a minute.

Note

Word to know: flash. Flashing means copying a program onto a chip. The chip keeps it even when unplugged, like saving a game.

1

Plug in

Connect the USB-C cable from the board to a computer (Windows, Mac, Chromebook or Linux). Remember: a data cable, not a charge-only one.

2

Click Flash to board

Scroll up to Files & downloads and click Flash to board. Use Chrome or Edge. Pick the port that appears, click Install, and wait for the green tick.

3

Watch it wake up

Two eyes open on a near-black screen. Within a few seconds they blink and glance to one side. Each board picks its first look from its own hardware ID, so yours may not match the photos.

Tip

No port in the list? Hold BOOT, tap RESET, let go of BOOT, then click Flash again. On a Mac the port is usually called usbmodem. Phones and Safari can't flash; use a computer.


Play it

Four things to try, in order.

1

Leave it alone = it comes alive

Every few seconds it glances somewhere new. It blinks, and now and then it winks. Every 12 to 22 seconds it tries a mood: happy, curious, excited, dizzy or sleepy. In the clip, dizzy turns the pupils into spinning rings.

Leave it alone = it comes alive
2

Poke it = short press on BOOT

The eyes jump and go wide with tiny pupils (surprised), then the bottom lids rise and the cheeks blush (happy).

3

Hold BOOT = next look

Hold for about 0.7 seconds. It blinks, and when the eyes open the paint has changed. Nine looks: cloud, periwinkle, glowstick, matcha, blueberry, bubblegum, lagoon, peach, ghost. It remembers your pick after you unplug it.

Hold BOOT = next look
4

Wait = drowsy, then asleep

Leave it 75 seconds with no pokes and the lids start to droop. About 12 seconds later it is asleep: eyes shut, screen dimmed. Poke BOOT and it stretches, looks surprised, then smiles.

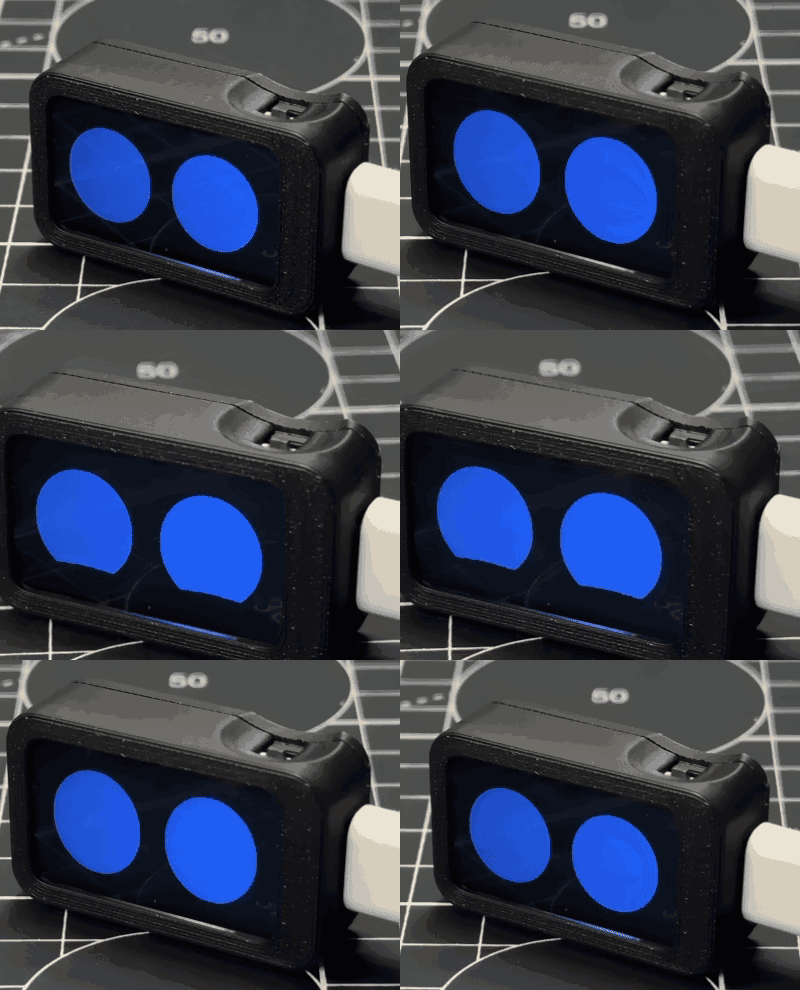
The blue periwinkle look blinking, then one eye opening wider in the curious mood
Blink. The periwinkle look has no pupil at all, so the whole eye is one blue oval.

How it works: five tiny lessons

You don't need to read the whole program (it's in Files & downloads if you're curious). Each lesson below shows the one small piece of code that does the job, and gives you something to try.

Lesson 1: A creature is a loop

The chip runs the same short list many times a second: How much time just passed? Move the gaze a little toward its target. Maybe blink. Draw both eyes into memory. Show the picture. Repeat.

Games call this the game loop. The time step dt is clamped, so if the chip hiccups the pupils glide instead of teleporting.

slab-eyes.ino
void loop() {
  const uint32_t now = millis();                                    // the stopwatch
  const float dt = clampf((now - lastMs) / 1000.0f, 0.001f, 0.08f); // seconds since last frame
  lastMs = now;
  pollBoot();        // was BOOT pressed?
  pollSerial();      // did the computer say something?
  update(now, dt);   // move the gaze, maybe blink, pick a mood
  drawFace();        // draw both eyes into memory, then show them
}

Simplified from loop(). millis() counts milliseconds since the board turned on.

Tip

Try it: open the Serial Monitor (see Secret commands below). Every 5 seconds the board prints fps=, the number of pictures it drew per second. How many does it manage?

Lesson 2: Two ellipses on a stage

The screen is 320 wide and 172 tall. The left eye is centred near x = 86, the right near x = 234, both at y = 86. An ellipse is a stretched circle: EYE_A is half its width, EYE_B half its height. The pupil sits inside and slides toward wherever the eye is looking.

You can graph this on squared paper. The code is that graph, filled with colour.

slab-eyes.ino
static const int   FB_W = 320;    // screen width in pixels
static const int   FB_H = 172;    // screen height
static const float EYE_L_X = 86;  // left eye centre
static const float EYE_R_X = 234; // right eye centre
static const float EYE_Y = 86;    // both eyes, up and down
static const float EYE_A = 58;    // half the eye's width
static const float EYE_B = 64;    // half the eye's height
static const float PUPIL_R = 22;  // pupil radius
Tip

Try it on paper: draw a 32 × 17 grid (one square = 10 pixels). Put a dot at (8.6, 8.6) and one at (23.4, 8.6). Draw an oval about 12 squares wide and 13 tall around each. Those are your eyes.

Lesson 3: Moods are behaviour packs, looks are paint

A mood is not a picture. It is a set of knobs: how high the bottom lid rises, how big the pupil is, whether the cheeks blush. happy lifts the bottom lids; sleepy droops the top ones; surprised shrinks the pupils.

A look is only paint: eye colour, pupil colour and pupil shape. Keeping how it acts apart from how it looks is a habit every game needs.

slab-eyes.ino
switch (mood) {
  case MOOD_HAPPY:     L.bot = R.bot = 0.58f; wantBlush = 1;  break;  // bottom lids up, pink cheeks
  case MOOD_SLEEPY:    L.top = R.top = 0.42f + drowsy * 0.3f; break;  // top lids droop, more as it tires
  case MOOD_SURPRISED: L.sx = R.sx = 1.12f; L.pupil = R.pupil = 0.42f; break; // wide eyes, tiny pupils
  case MOOD_ANNOYED:   L.top = R.top = 0.40f; L.ang = R.ang = 0.65f; break;   // lids tilt into a frown
}

//  name          eye colour       pupil colour   ...  pupil shape
{"glowstick",    {200, 255, 30},  {10, 10, 16},  ...  ST_SLIT},

Simplified from update() and the LOOKS table. Every colour is {red, green, blue} from 0 to 255.

Tip

Try it: type mood surprised in the Serial Monitor, then mood sad. Watch the pupils, the lids and the cheeks. Sad even adds a tear. Then look matcha: its two pupils are different colours.

Lesson 4: Timers make it feel alive

Nothing tells the eyes when to blink. Instead, every time a blink finishes, the program rolls a dice and writes down a time for the next one: somewhere between 2.6 and 5.2 seconds from now. Glances, winks, fidgets and moods all have their own dice. Because the gaps are never quite the same, it never looks like a machine.

slab-eyes.ino
static void scheduleBlink(uint32_t from) {
  nextBlinkAt = from + random(2600, 5200);   // 2.6 to 5.2 seconds from now
}
static void scheduleGlance(uint32_t from) { nextGlanceAt = from + random(2800, 6200); }
static void scheduleWink(uint32_t from)   { nextWinkAt   = from + random(8000, 18000); }

// later, many times a second:
if (!blinking && after(now, nextBlinkAt)) startBlink(now, false);

Simplified from scheduleBlink() and update(). after() asks: has the stopwatch passed that time yet?

Tip

Try it: count blinks for one minute. You should get roughly 15. Then work out why: the average gap is about 3.9 seconds, and 60 ÷ 3.9 ≈ 15.

Lesson 5: Whole numbers can be faster

This chip has no FPU, the part of a processor that does decimal maths fast. The first eyes used decimals for every pixel and crawled at about 0.1 frames per second: a slideshow, not a creature.

The fix: draw each eye one row at a time, and work out each row's width with whole numbers only. The lesson is not 'never use decimals'. It is: measure, then pick numbers that fit your hardware.

slab-eyes.ino
// C6 has no FPU: keep the inner loop integer.
for (int y = cy - ry; y <= cy + ry; y++) {
  const int dy = y - cy;
  const int half = isqrt(rx * rx * (ry * ry - dy * dy) / (ry * ry)); // how wide is this row?
  for (int x = cx - half; x <= cx + half; x++) {
    fb[y * FB_W + x] = colour;                                       // fill the row
  }
}

Simplified from fillEllipse(). isqrt() is a square root that only ever uses whole numbers.

Note

Why doesn't it flicker? The program draws the whole picture into a block of memory called a frame buffer (320 × 172 pixels × 2 bytes, about 110 KB), then copies only the rows that changed to the screen in one go. Like finishing a drawing before you hold it up.


Secret commands

Your computer can chat with the board through the same USB-C cable. That chat is called serial. Open the Serial Monitor in Arduino IDE (or any serial app) at 115200, type a word, press Enter.

Type this What happens
help lists every command and every mood
status tells you the mood, the look, and whether it is awake
look list names all nine looks with their numbers
look ghost jumps to a look by name or number; look next steps on
mood dizzy forces a mood for 8 seconds: happy, sleepy, curious, surprised, love, dizzy, annoyed, sad, excited
gaze 1 -1 steers both pupils: x and y from -1 to 1
blink / wink one blink, or one wink
poke / pet same as pressing BOOT, or a friendly stroke
sleep / wake lights out, or good morning
Tip

Secret of the secret commands: type pet three times within five seconds. The eyes fall in love: heart-shaped pupils, pink cheeks, and the little light on the back of the board turns heart-red. Normally that light glows in the colour of the current look.


Level up: change the code

Ready to make it yours? Download slab-eyes.ino and c6_slab_pins.h, put them in a folder called slab-eyes, and open the .ino in Arduino IDE. Change the include line near the top to #include "c6_slab_pins.h". Board: ESP32C6 Dev Module, USB CDC On Boot: Enabled. Libraries: GFX Library for Arduino and Adafruit NeoPixel.

Ideas, easiest first:

  • Change a look's colours: the three numbers after the name are the eye colour.
  • Make it blink more: in scheduleBlink, change random(2600, 5200) to random(1000, 2000).
  • Make it fall asleep sooner: set DROWSY_AFTER_MS to 20000 (20 seconds).
  • Add a tenth look: copy one line of LOOKS, give it a new name, and pick a pupil shape: ST_ROUND, ST_DOT, ST_SLIT or ST_STAR.
slab-eyes.ino
//  name       eye colour        pupil colour     has pupil?  2nd pupil   2nd?   shine  shape     blush
  {"ghost",   {250, 250, 255},  {120, 140, 255}, true,       {0, 0, 0},  false, false, ST_STAR,  {190, 200, 255}},

One look is one line. Ghost: pale eyes, lilac star pupils, no shine spot.


If something goes wrong

  • Screen stays black after flashing. Press RESET once. Still black? Try a different USB-C cable; many are charge-only.
  • No port shows up. Hold BOOT, tap RESET, release BOOT, click Flash again.
  • Eyes look upside down or sideways. The program always draws them landscape. Turn the case so the button tabs are along the top edge, like in the photos.
  • Board won't sit flat in the frame. Look for a blob of plastic in the notch and trim it.
  • Screen looks a bit dim. On purpose. It runs at 50% brightness so the panel never gets a hot spot, and it dims further while asleep. Poke it.
  • It looks sad. Nobody has poked it for a while. Say hello with BOOT.

Build photos

Licensed under CC BY-SA 4.0. Check with the author before commercial use.