By the PrintPal team
On this page
- The short answer
- The maker ladder, step by step
- No-wiring builds kids can finish in an afternoon
- A first real circuit: the reaction-time game
- Coding with no wires: a micro:bit dice
- Try it free in a simulator first
- Kids designing their own cases
- Safety rules for young makers
- For parents and teachers
- FAQ
- Sources and method
Key takeaways
- From age 8, start with no wiring at all: a click-together ESP32 build in a printed case, or a BBC micro:bit with MakeCode blocks (built for ages 8 to 14).
- From about age 10, an Arduino on a breadboard teaches real circuits with no soldering. The reaction-time game below is a perfect first project.
- Try circuits free in a simulator first: Wokwi and Tinkercad Circuits run Arduino code in the browser.
- Kids can design their own cases in Tinkercad, which is free, ad-free, and kidSAFE and COPPA certified.
- Soldering, lithium batteries and 3D printers need an adult nearby: eye protection, ventilation, and never leaving a printer running unattended.
The short answer
For ages 8 to 10, start with projects that need no wiring: a click-together ESP32 build with a printed case, or a BBC micro:bit programmed with MakeCode blocks. From about 10, move to an Arduino on a breadboard with LEDs, buttons and buzzers. Leave soldering, lithium batteries and mains power until later, and always with an adult nearby.
| Age | Start with | Why it works | Cost |
|---|---|---|---|
| 8 to 10 | Click-together builds or a micro:bit with MakeCode blocks | No wires, quick results; MakeCode blocks are for ages 8+ | $18–32 per build; micro:bit Go bundle $19.95 |
| 10 to 13 | An Arduino on a breadboard; micro:bit in Python (11+) | Real circuits, no soldering | Uno R4 Minima $20 list, plus a few dollars of parts |
| 13 to 14+ | ESP32 projects with Wi-Fi; first soldering with supervision | Gadgets that go online; Arduino rates its classroom Starter Kit 14+ | $15–35 per project |
The Micro:bit Educational Foundation designs the micro:bit for ages 8 to 14 and MakeCode blocks for 8+ (its Python editor for 11+). Arduino's education brochure lists the Starter Kit Classroom Pack at 14+ and the Education Starter Kit at 11 to 14. Every child is different.
The maker ladder, step by step
Kids stay hooked when every project works. The ladder at the top of this page adds one new idea per step, so nothing arrives at once: first code, then circuits, then tools, then the internet.
1. Click-together kits (from age 8)
A board with the screen already on it drops into a printed case. Kids print the parts, press them together and load the program from a web page. They learn what a program does by changing one number and seeing what happens. PrintPal's build guides are written this way, with "try it" challenges in every lesson.
2. Blocks and simulators (from age 8)
The BBC micro:bit has an LED grid, buttons, a motion sensor, a speaker and a microphone built in, so kids can code before they wire anything. MakeCode uses drag-and-drop blocks and shows a working micro:bit on screen. Wokwi and Tinkercad Circuits do the same for Arduino and ESP32 circuits.
3. Breadboard circuits (from about 10)
A breadboard holds parts and wires with friction, so mistakes are free. An Arduino Uno R4 runs at 5 V like most beginner parts, and three parts (an LED, a button and a buzzer) are enough for a real game.
4. Soldering (from about 12, with an adult)
Soldering makes a project permanent and opens up LED strips and sensors without headers. It needs a stand for the iron, eye protection and ventilation. An adult should be in the room for the first sessions.
5. Wi-Fi gadgets and their own case (from about 14)
ESP32 boards join Wi-Fi, fetch the weather, serve web pages and talk to phones. Teens can design the enclosure themselves and follow our Arduino and ESP32 projects guide.
No-wiring builds kids can finish in an afternoon
Each of these PrintPal build guides has the printable case, a parts list, photo steps, short lessons with challenges, and a button that loads the program from Chrome or Edge.
 No soldering
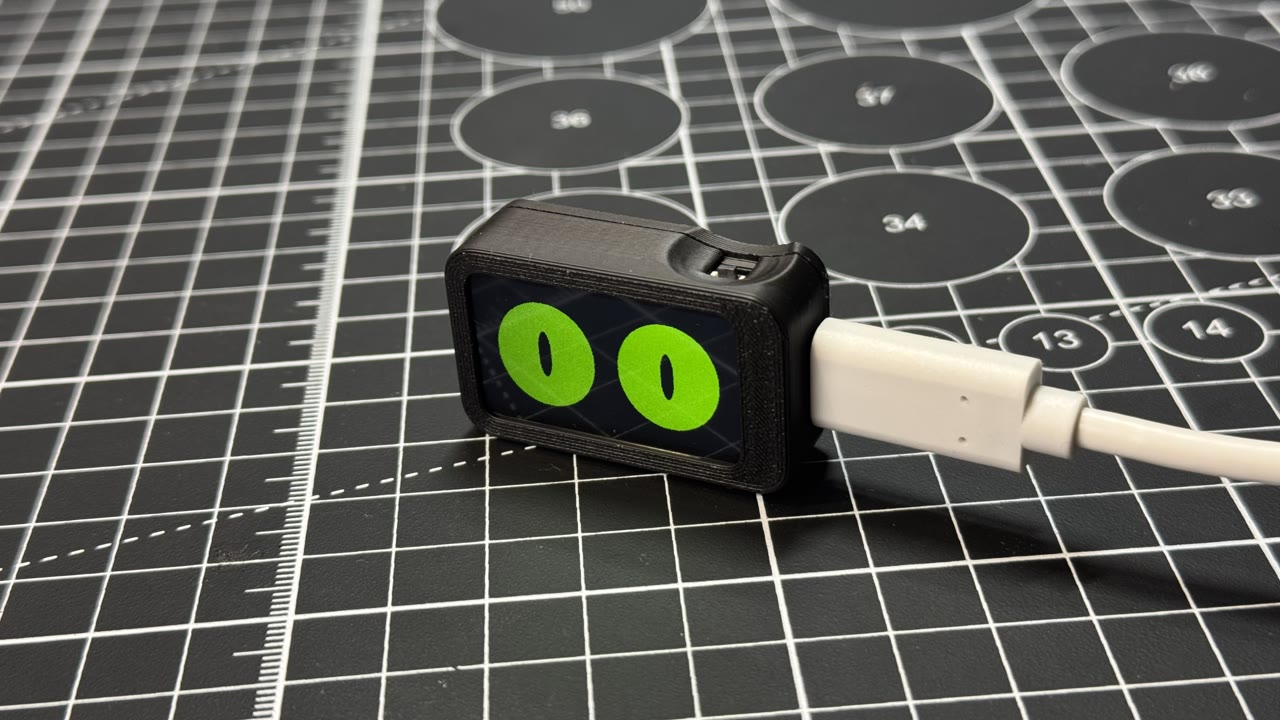
Slab eyes
Cartoon eyes in a tiny printed case that look around, blink, wink and doze off on their own.
Open the build guide
 No soldering
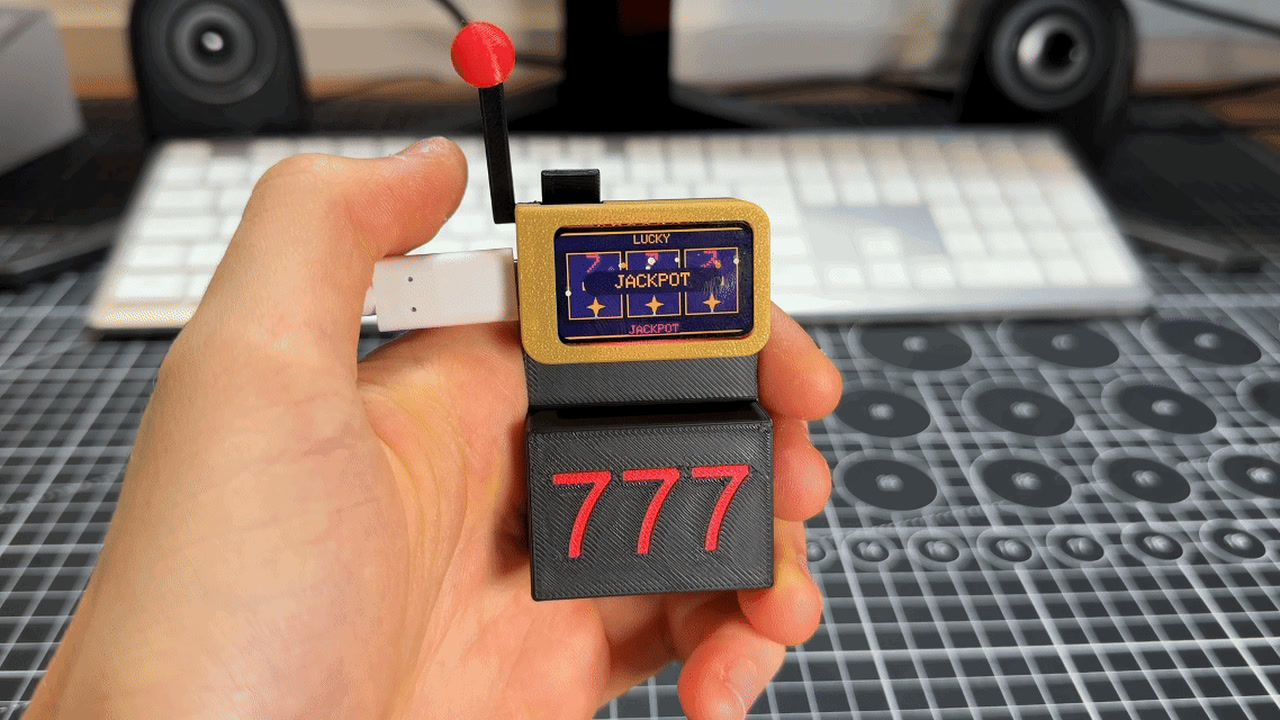
Lucky slab slot machine
A hand-sized slot machine with a real printed lever and three neon reels.
Open the build guide
 No soldering
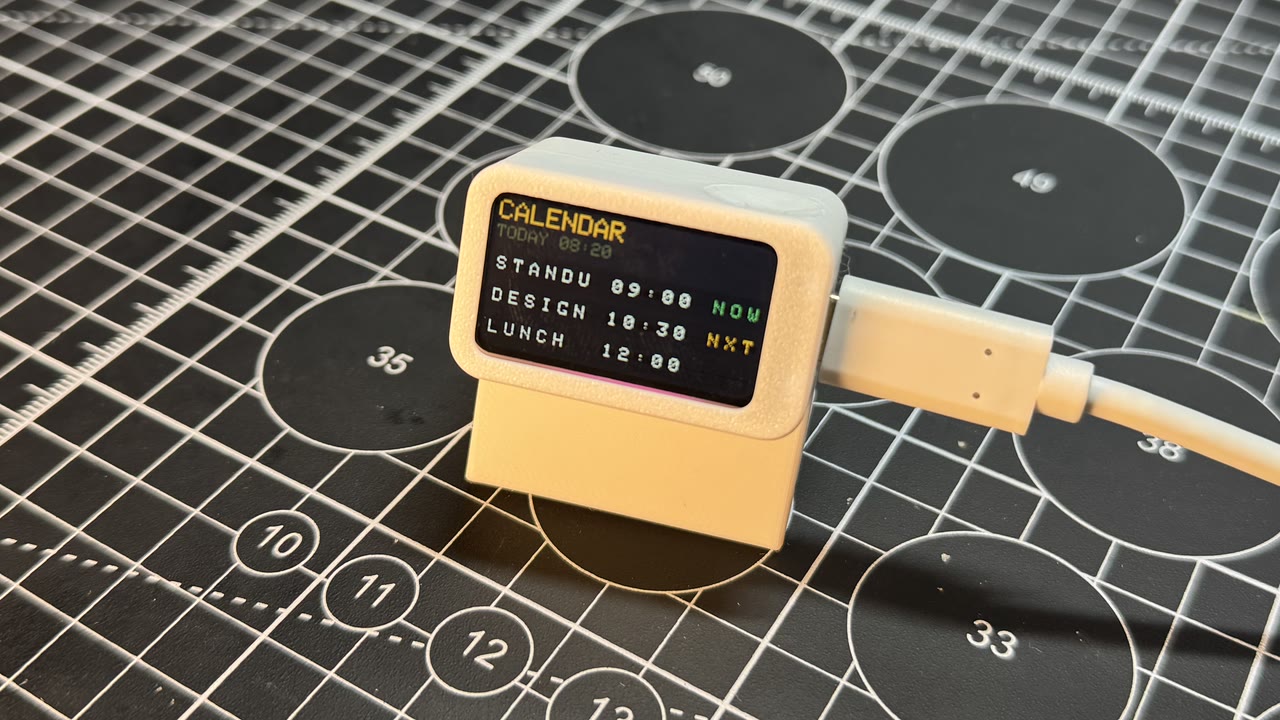
Split-flap departure slab
A desk-sized airport departures board where flights click in letter by letter.
Open the build guide
 No soldering
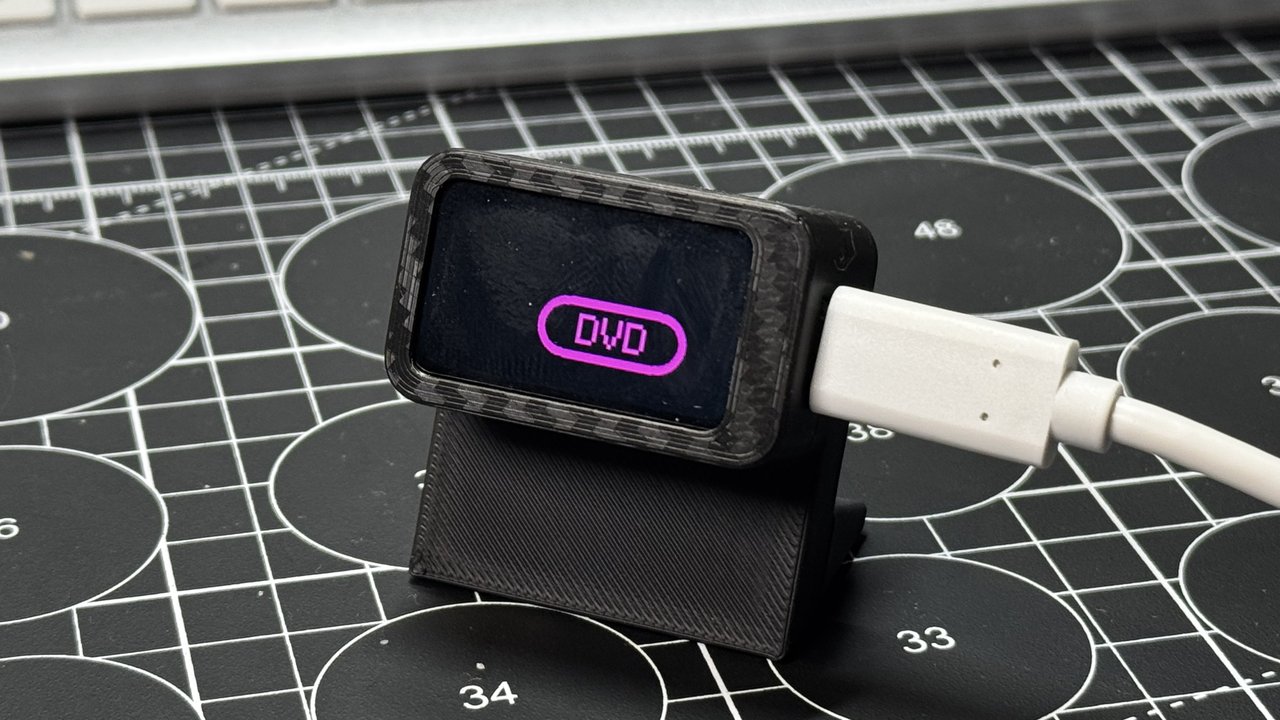
DVD screensaver slab
The bouncing DVD logo plus a running dino and a space invader, in a printed stand.
Open the build guide
 No soldering
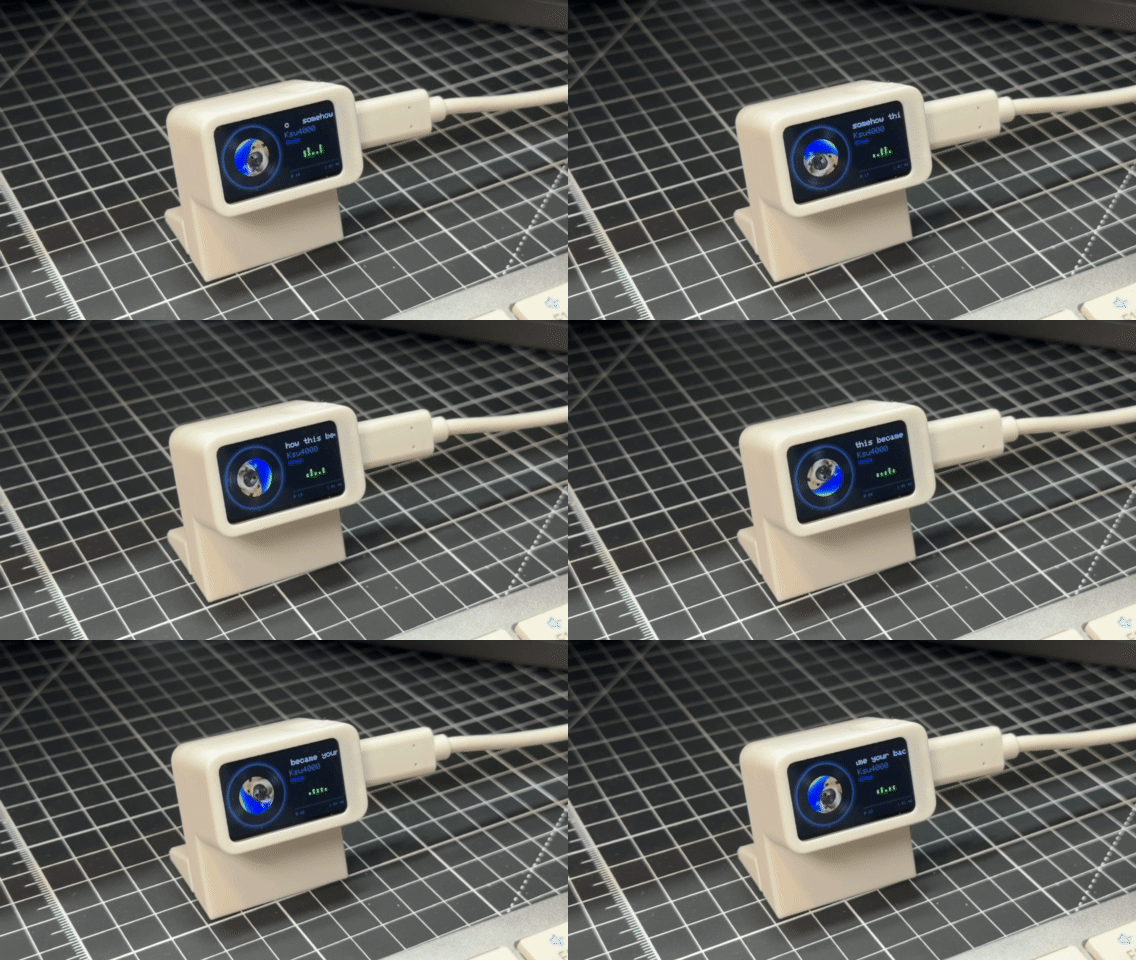
Music Play Pal
Shows the song playing on your PC with the album cover spinning like a record. One USB-C cable, no Wi-Fi.
Open the build guide
 No soldering
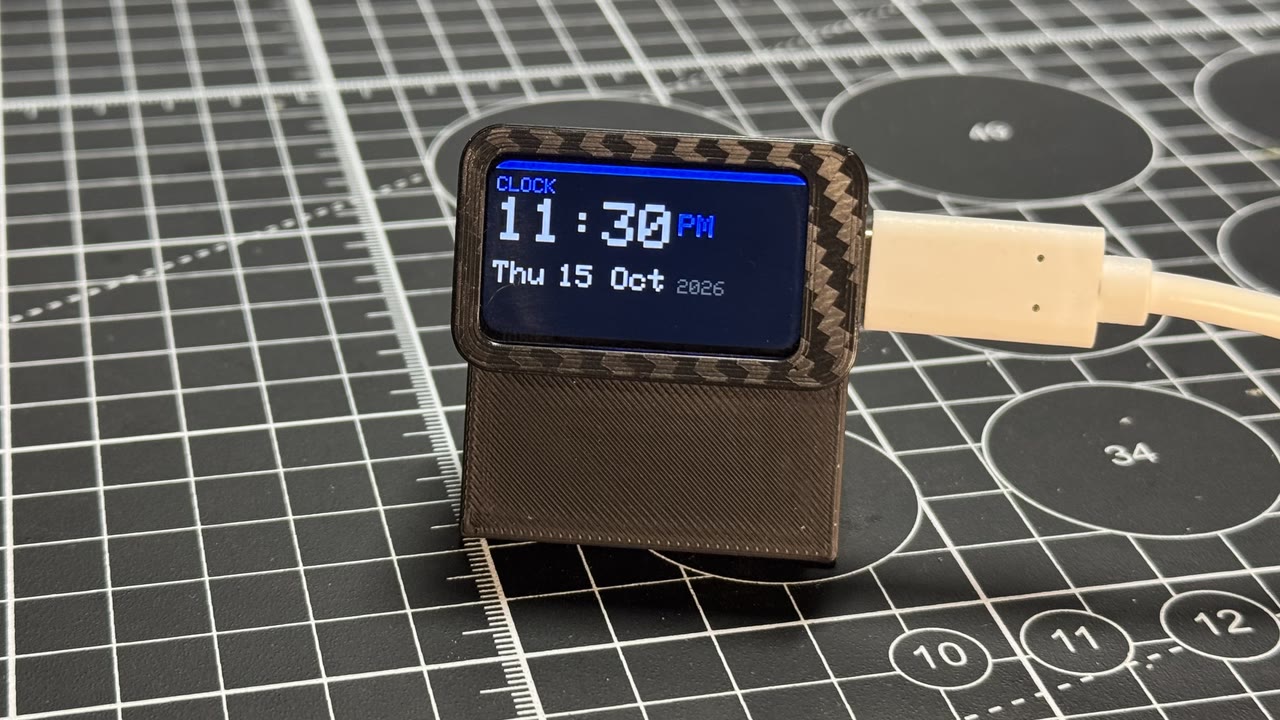
Desk command slab
Three pages on a tiny desk brick: a clock, today's weather, and a message you type on your phone.
Open the build guide
 No soldering
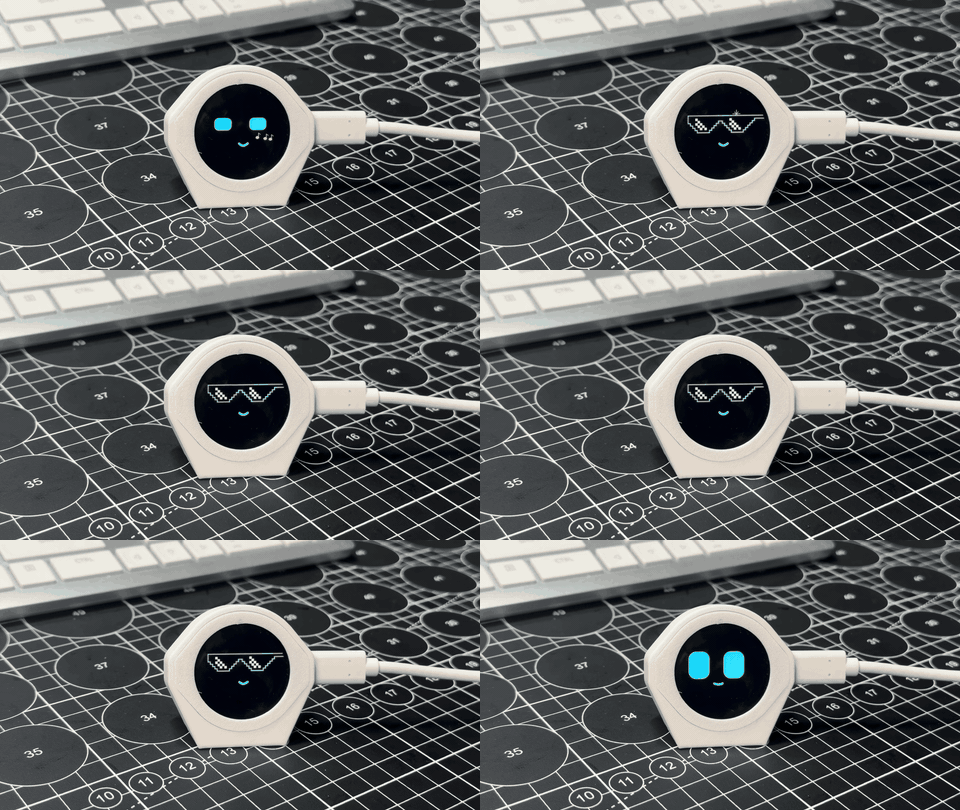
Desk Pal buddy
A desk pet with big eyes and real moods that reacts to taps, pets and shakes, and reminds you to drink water.
Open the build guide
 No soldering
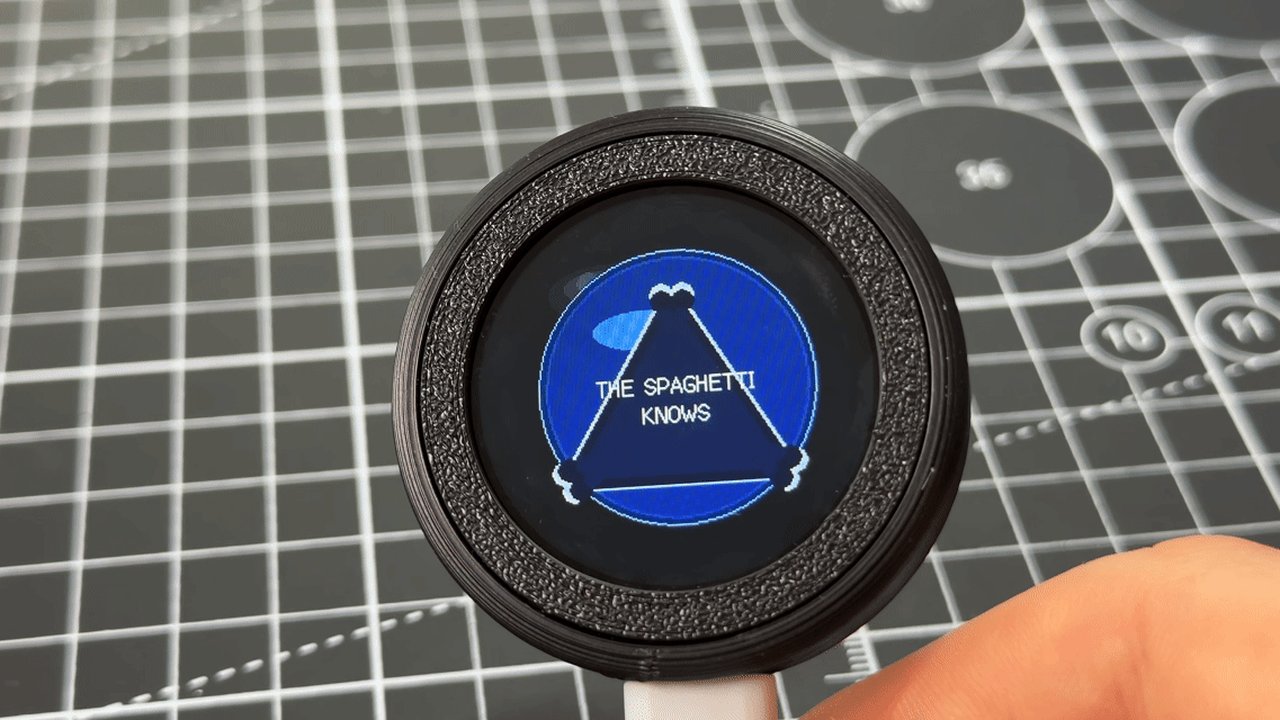
Desk Pal fortune 8-ball
A printed magic 8-ball: ask a question, shake or tap, and an answer swirls up.
Open the build guide
 No soldering
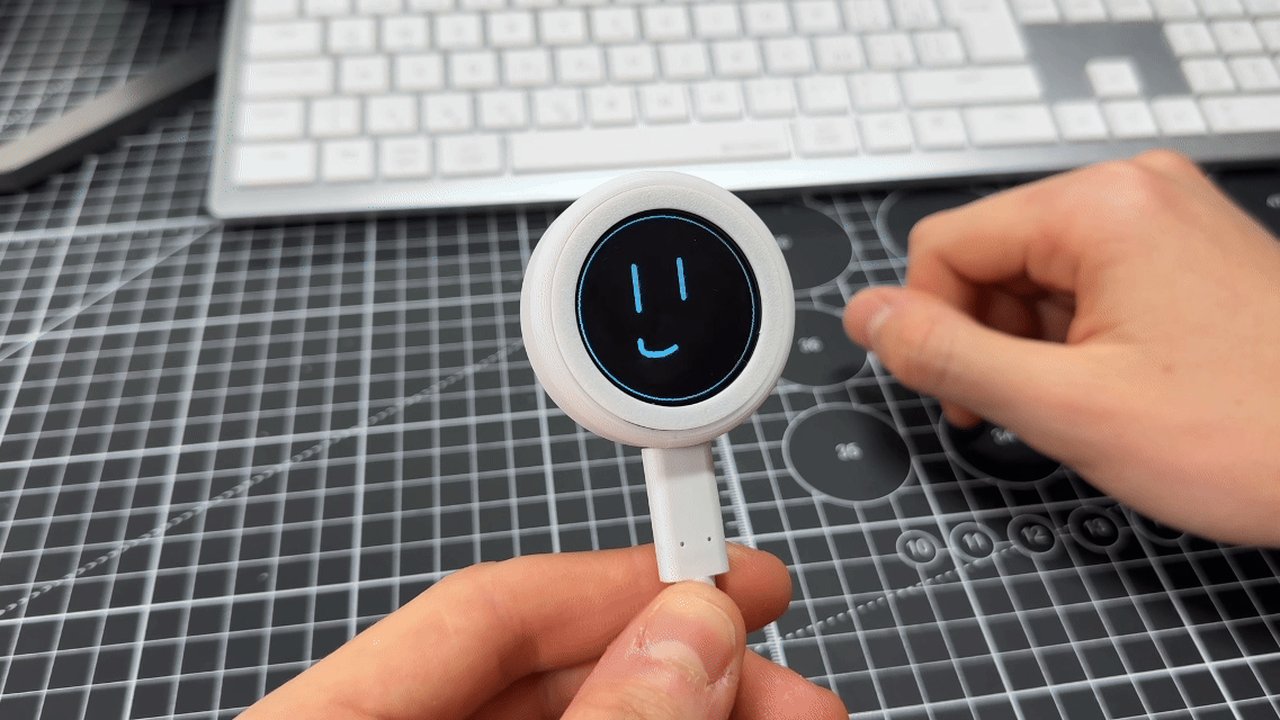
Desk Pal touch doodle
A round finger-painting pad: draw with a fingertip, hold still to change ink, shake to erase.
Open the build guide
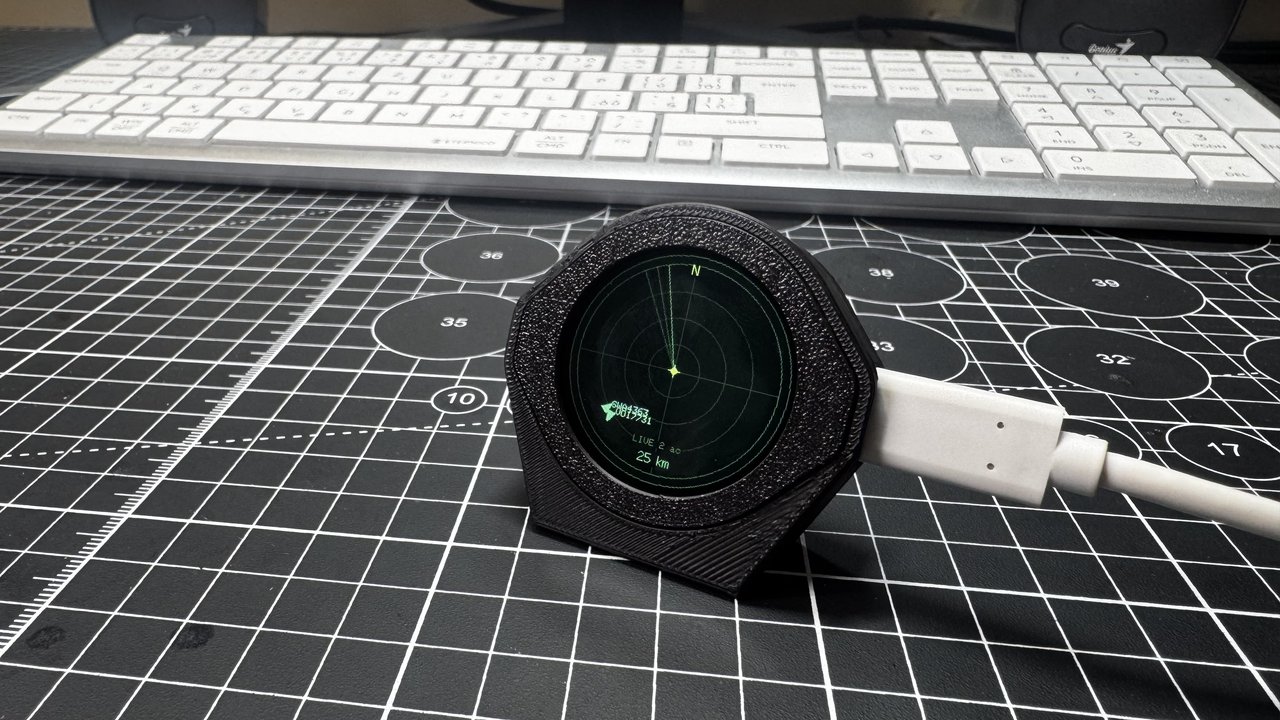 No soldering
Desk Pal plane radar
A radar scope that shows real planes flying near your home, with their callsigns.
Open the build guide
| Build | Age | Time | What they learn |
|---|---|---|---|
| Slab eyes | 8+ | 45 min | How a loop that runs many times a second makes a drawing feel alive; Coordinates: two ellipses on a 320 × 172 screen |
| Lucky slab slot machine | 8+ | 45 min | How a computer picks random numbers; Probability: why the house wins |
| Split-flap departure slab | 8+ | 45 min | How a table of data drives a display; One button, many actions |
| DVD screensaver slab | 8+ | 45 min | Bouncing: velocity and collisions with the screen edges; How pixel art is stored |
| Music Play Pal | 11+ | 30 min | How a computer and a board talk over USB serial; Showing images on a tiny screen |
| Desk command slab | 11+ | 1h 10m | How a gadget joins Wi-Fi (station and access-point modes); Serving a web page from the board |
| Desk Pal buddy | 8+ | 45 min | A game loop at about 33 frames a second; A face made of 12 numbers, eased between moods |
| Desk Pal fortune 8-ball | 8+ | 45 min | States: waiting, shaking, revealing; Random numbers |
| Desk Pal touch doodle | 8+ | 40 min | How pixels and colours are stored; Reading touch coordinates |
| Desk Pal plane radar | 14+ | 1h 30m | Fetching live ADS-B data over Wi-Fi every 20 s; Haversine distance and bearing |
A first real circuit: the reaction-time game
Three parts, seven wires and about 40 lines of code make a game kids will play for an hour: wait for the light, press as fast as you can, beat your record. It teaches what a circuit is, why LEDs need resistors and how a computer measures time.
Reaction-time game on an Arduino Uno R4
The LED lights after a random wait; press the button as fast as you can. The Serial Monitor shows your time in milliseconds and cheers a new record. Press too early and the buzzer grumbles.
- Beginner (age 10+)
- 45 minutes
- About $25 in parts
- A circuit is a loop: out of a pin, through a part, back to ground
- Why an LED needs a resistor
- Measuring time with millis()
- Random waits make a fair test
Parts list
| Qty | Part | Why |
|---|---|---|
| 1 | Arduino Uno R4 Minima | $20 list; any Uno works |
| 1 | Half-size breadboard | Parts push in; no soldering |
| 1 | Push button | A big arcade button is more fun |
| 1 | LED | Any color |
| 1 | 1 kΩ resistor | Keeps the LED current around 3 mA, inside the R4's 8 mA per pin |
| 1 | Passive piezo buzzer | Optional, for sound |
| 6 | Jumper wires | |
| 1 | USB-C data cable |
Wiring
| From | To | Wire | Note |
|---|---|---|---|
| Uno R4 Minima D2 | Button A | Signal | Reads LOW when pressed |
| Uno R4 Minima GND | Button B | Ground | |
| Uno R4 Minima D8 | Resistor A | Signal | |
| Resistor B | LED + | Signal | Long leg |
| Uno R4 Minima GND | LED - | Ground | Short leg |
| Uno R4 Minima D5 | Buzzer + | PWM / signal | Sound |
| Uno R4 Minima GND | Buzzer - | Ground |
INPUT_PULLUPholds pin 2 HIGH until the button connects it to ground, so the button needs no resistor.
Code
const int LED = 8;
const int BUTTON = 2;      // button to GND: pressed reads LOW
const int BUZZER = 5;      // a passive piezo buzzer

unsigned long best = 0;

void setup() {
  pinMode(LED, OUTPUT);
  pinMode(BUTTON, INPUT_PULLUP);
  Serial.begin(9600);
  randomSeed(analogRead(A0));                 // an unconnected pin gives a noisy seed
  Serial.println("Press the button when the light comes on!");
}

void loop() {
  delay(1000);
  Serial.println("Get ready...");
  unsigned long wait = random(1500, 5000);    // 1.5 to 5 seconds, so nobody can guess
  unsigned long start = millis();
  while (millis() - start < wait) {
    if (digitalRead(BUTTON) == LOW) {         // pressed too early
      Serial.println("Too soon! Wait for the light.");
      tone(BUZZER, 200, 400);
      delay(1500);
      return;
    }
  }

  digitalWrite(LED, HIGH);
  unsigned long lit = millis();
  while (digitalRead(BUTTON) == HIGH) {}      // wait for the press
  unsigned long ms = millis() - lit;
  digitalWrite(LED, LOW);
  tone(BUZZER, 1500, 100);

  Serial.print("Your time: ");
  Serial.print(ms);
  Serial.println(" ms");
  if (best == 0 || ms < best) {
    best = ms;
    Serial.println("New record!");
  }
  while (digitalRead(BUTTON) == LOW) {}       // wait until the button is let go
}
No libraries. Board: Arduino UNO R4 Minima. Open the Serial Monitor at 9600 baud to play.
Build it
- Build the circuit
Follow the wiring table. The LED only works one way round: long leg toward the resistor.
- Upload the code
Install Arduino UNO R4 Boards in Boards Manager, pick the board and port, click Upload.
- Open the Serial Monitor
Set it to 9600 baud. It says "Get ready...".
- Play
Press when the light comes on. Too early and the buzzer grumbles.
- Make it yours
Add a second button for two players, keep a top-three list, or make the wait longer.
Print settings: PLA, 0.2 mm layers, 2 walls, 15% infill.
A game-console shell: a box with a big round hole for the button on top, a window for the LED and a slot for the USB cable. It makes a great first Tinkercad design: a box, a cylinder hole and a smaller hole are all it takes.
Coding with no wires: a micro:bit dice
Shake-to-roll dice on a BBC micro:bit
Shake the micro:bit and it shows a number from 1 to 6 on its LED grid. Seven lines of Python, no wiring, and a printed holder to make it feel like a real gadget.
- Beginner (age 8+ with blocks, 11+ in Python)
- 20 minutes
- $19.95 (Go bundle) in parts
- Reading a motion sensor
- Random numbers
- A loop that waits for something to happen
Parts list
| Qty | Part | Why |
|---|---|---|
| 1 | BBC micro:bit V2 Go bundle | The board with a USB cable and a battery pack |
| 15 g | PLA filament | For a holder that keeps the battery pack and board together |
Code
from microbit import *
import random

while True:
    if accelerometer.was_gesture('shake'):
        display.show(random.randint(1, 6))
        sleep(1500)
        display.clear()
    sleep(50)
MicroPython for the micro:bit. Prefer blocks? In MakeCode, use on shake and show number (pick random 1 to 6).
Build it
- Open the editor
Go to python.microbit.org, or makecode.microbit.org for blocks.
- Type the code
Indentation matters in Python: the lines under
ifmove in by four spaces. - Send it to the micro:bit
Connect it by USB and click Send to micro:bit in Chrome or Edge, or download the file and drag it onto the MICROBIT drive.
- Shake it
Then challenge: show dice dots instead of numbers, or make it roll two dice.
Print settings: PLA, 0.2 mm, 2 walls.
A snug frame that leaves the LED grid and buttons open, with a pocket for the battery pack. Measure the board with calipers, and keep the edge connector at the bottom reachable for later projects.
Try it free in a simulator first
Simulators let kids test code and wiring before any parts arrive, and nothing can burn out.
| Simulator | Simulates | Cost | Good to know |
|---|---|---|---|
| Wokwi | Arduino, ESP32, Raspberry Pi Pico | Free Community tier | Unlimited simulations and public projects, virtual Wi-Fi |
| Tinkercad Circuits | Arduino Uno R3 | Free | Code with blocks that become C++, then export the .ino |
| MakeCode | BBC micro:bit | Free | A live micro:bit on screen beside the blocks |
Kids designing their own cases
The moment a child prints a case they designed, the project becomes theirs. Tinkercad is the place to start: free, ad-free, kidSAFE and COPPA certified, and built from boxes, cylinders and holes. Teachers can add students with just a nickname and a class code, with no email address, in classes of up to 250, and Safe Mode is on by default.
- Measure first. A cheap pair of digital calipers teaches more about design than any tutorial.
- Leave room. Add about 0.3 mm around a board so it slides in without force.
- Print small tests. Print just the corner with the USB hole before printing the whole box.
PrintPal's free makers turn a few choices into a printable model, which is a fun way in before CAD:


Safety rules for young makers
- Stay on USB power for the first projects. USB is 5 V and limited; mains electricity is never a kids' project.
- Treat lithium batteries with respect. Use protected cells and a proper charger, never puncture or crush them, and charge only at room temperature.
- 3D printers are hot. The nozzle runs at around 200 °C or more. Do not touch it, and keep long hair back.
- Do not leave a printer running unattended, and print in a ventilated room. UL's guidance applies at home and in classrooms.
- Start with PLA, which generally emits less than ABS or nylon.
For parents and teachers
- Cost per child: about $20 to $32 for a click-together build, $20 for a micro:bit Go bundle, and about $25 for an Arduino starter circuit. Boards are reusable from project to project.
- Free software all the way: MakeCode, Tinkercad, Wokwi's Community tier, Arduino IDE and the Arduino Cloud free plan (2 Things, 25 compiles a day).
- One printer serves a class. The click-together cases take 10 to 25 g of PLA each.
- Teach the debugging habit: check the cable, check the port, read the error, change one thing at a time.
Frequently asked questions
What age can kids start electronics projects?
Around 8, with projects that need no wiring: the BBC micro:bit is designed for ages 8 to 14 and its MakeCode blocks for 8+, and click-together ESP32 builds need only a printed case and a USB cable. Breadboard circuits suit most kids from about 10, and soldering from about 12 with an adult.
Is Arduino or micro:bit better for kids?
The micro:bit is better for ages 8 to 11: sensors, buttons, LEDs and a speaker are built in, and MakeCode blocks run in the browser. Arduino is better from about 10 or 11, when kids are ready to build circuits on a breadboard.
Do kids need to solder for electronics projects?
No. Click-together builds, the micro:bit and breadboard circuits need no soldering. Soldering can wait until a project needs permanent joints, and should be done with eye protection, ventilation and an adult nearby.
What is a good first electronics project for a kid?
For ages 8 to 10, a no-wiring build such as PrintPal's Slab eyes or Desk Pal buddy, or a micro:bit dice. For 10 and up, a reaction-time game on an Arduino with an LED, a button and a buzzer.
Is 3D printing safe for kids?
With supervision. The nozzle is hot, printers release fine particles (PLA generally less than ABS or nylon), and UL advises never leaving a printer running unattended. Print PLA in a ventilated room and keep an adult nearby.
Can kids design their own 3D-printed cases?
Yes. Tinkercad is free, ad-free, and kidSAFE and COPPA certified, and teachers can add students without an email address. Kids measure the board with calipers, add a little clearance and print a small test first.
How much does it cost to start electronics with kids?
About $20 for a micro:bit Go bundle or an Arduino Uno R4 Minima (list price), plus a few dollars of LEDs, buttons and wires. Click-together ESP32 builds cost about $18 to $32 including the board. The software is free.
Sources and method
Age guidance comes from the Micro:bit Educational Foundation and Arduino's education materials; where we suggest an age ourselves, we say so. Prices are list prices from Arduino and Adafruit on November 12, 2026. Safety guidance comes from university environmental health and safety offices and UL Research Institutes. The two projects were written for this guide; the build guides are PrintPal's own.
- Micro:bit Educational Foundation: mission · ages 8 to 14
- What is the micro:bit? · MakeCode 8+, Python 11+
- micro:bit features
- micro:bit V2 Go bundle at Adafruit
- Arduino education brochure (Starter Kit ages)
- Arduino Uno R4 Minima
- Arduino Cloud plans
- Wokwi pricing
- Tinkercad Circuits guide (PDF)
- Tinkercad · free, kidSAFE and COPPA
- Tinkercad for teachers
- University of Illinois: soldering safety
- MIT EHS: soldering safety
- Adafruit: Li-ion and LiPoly protection
- UL Chemical Insights: 3D printing
- UL 200B guidance
Spotted something out of date? Tell us and we will re-check it.