About this video
A beginner electronics project for your desk
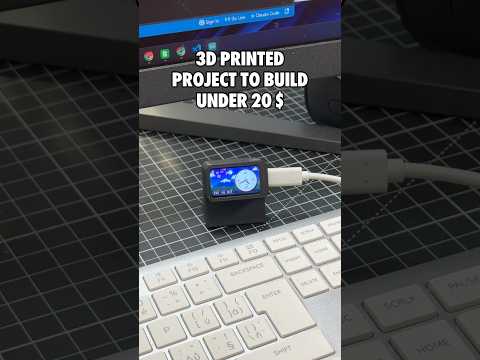
Slab eyes is a pair of cartoon eyes in a small 3D printed case. They glance around, blink, wink, change moods and doze off when nobody plays with them. It's an easy way to learn the basics of electronics, 3D printing and coding: no soldering, no wiring and nothing to install. The full guide, print files and code are free in the Slab eyes build guide.
What you need (about $18)
| Part | Notes |
|---|---|
| Waveshare ESP32-C6-LCD-1.47 | The microcontroller and a 1.47-inch 172×320 screen on one board. Get the ESP32-C6 version; the case and firmware are made for this exact board |
| 3D printed case | Two parts (frame and back lid), about 10 g of PLA, no supports |
| USB-C data cable | Must carry data. Charge-only cables won't work |
| Chrome or Edge browser | To flash the code onto the board |
How to build it
- Print the case. Open the 3MF in Bambu Studio or the STL in any slicer. Use 0.2 mm layers, 2 walls, 15% infill and no supports. It prints in about 40 minutes.
- Press in the screen. The board drops into the frame from the back, with the USB-C port at the notch end. The openings on the side give you access to the BOOT and RESET buttons.
- Snap on the cover. Press the back lid on until it sits flush. No glue or screws.
- Flash the code from your browser. Plug the board into your computer and click Flash to board on the project page. Pick the port and connect, then wait for it to finish. If no port shows up, hold BOOT, tap RESET, let go of BOOT and try again.
How to play with it
- Short press on BOOT: poke it. The eyes jump, look surprised, then smile.
- Long press (about 0.7 s): switch to the next of nine looks: cloud, periwinkle, glowstick, matcha, blueberry, bubblegum, lagoon, peach and ghost. It remembers your choice after you unplug it.
- Leave it alone: it picks moods by itself (happy, curious, excited, dizzy, sleepy). After about 75 seconds without a poke it gets drowsy and falls asleep.
RESET just restarts the board. When you want to customize it, download the Arduino source (slab-eyes.ino) from the guide and change the colors, blink timing or moods.
What you learn
The guide uses this project to teach real programming ideas:
- How a game loop that runs many times a second makes a drawing look alive
- How screen coordinates place two eyes on a 320×172 display
- How random timers decide when to blink, glance and get sleepy
- Why whole-number maths is faster on a chip without a floating-point unit
More projects with the same ESP32-C6 screen
Once you have the board, you can reuse it in other PrintPal builds:
- Music Play Pal: shows the song playing on your PC with spinning album art. Click to pause, hold to switch to an animation.
- Desk command slab: a clock, today's weather and messages you type on your phone.
- Lucky slab slot machine: pull a printed lever to spin three neon reels.
- Split-flap departure slab and DVD screensaver slab
Browse every build in PrintPal Projects.
FAQ
Do I need coding experience?
No. The firmware is ready to go, and Flash to board loads it from your browser in about a minute. The source code is there when you want to tinker.
Does it work on a Mac?
Yes. Flashing works in Chrome or Edge on Windows, Mac, Chromebook and Linux. Safari and phones can't flash boards.
Does it have a camera?
No. Its "personality" comes from timers and random numbers, and that's the main coding lesson of the project.